THE PERFECT CUP OF COFFEE
I wanted to share about brewing a really good cup of coffee. All of the other posts have already covered so many aspects of this wonderful and amazing drink. Brewing that perfect cup of coffee is all about balancing a few important variables, so I thought I would contribute a little overview of a specific variable that is often overlooked.
One of the often overlooked variables is water temperature. It also happens to be one of the easiest to control, but requires a little effort and you never have to worry about it again.
Understanding how water temperature affects your coffee can accomplish a few things for you. It gives you water that’s consistent and reliable without having to think about it. It also enables you to focus on the other important variables like water quality, coffee storage, grind quality, bean type, etc.
Here is a rundown on the best water temperature for coffee and how you can find what works best for your taste.
HOW WATER AFFECTS COFFEE EXTRACTION
As I’m sure many already know, the hotter your water, the more quickly it extracts flavors from the coffee grounds. Near-boiling water only takes 2-4 minutes to produce a balanced extraction. Cold water, however, can take anywhere from 3-24 hours to produce cold brew coffee.
Most sources would say that the ideal temperature range for hot brewing is 195 to 205 degrees Fahrenheit.
This is hot enough to extract carefully and quickly, but not so hot that it’s uncontrollable.
• Coffee over 205 degrees Fahrenheit tends to over extract from the grounds, producing bitter coffee.
• Water under 195 degrees has a difficult time extracting, which often leads to sour or underdeveloped coffee.
The 195 to 205 degree range is not to be considered an objective standard of water temperature for coffee brewing. It’s just the range that most people around the coffee world tend to use the most because it tends to make the best, most balanced and consistent cup of Joe.
There are many coffee professionals who use lower temperatures to achieve different results in their coffee. For instance, if you are using a french press or an Aeropress, then lower temperatures can be amazing. One of the Aeropress Championship finalists in 2013 used water at 176 degrees. Others I have heard of use 190 degrees in the Aeropress.
In any case, you can't go wrong with the tried and true classic range of 195 to 205 degrees.
For camp coffee, I cannot recommend a better method than the simple pour over method. My favorite, is using a Kalita Wave Coffee Dripper.
Amazon Link to Kalita Wave

- Kalita Wave 185.jpg (38.89 KiB) Viewed 552 times
Using this with a kettle to heat your water allows you to control the water temperature, and the ration of coffee to water to an exact ratio.
Here is a simple picture of a pour over with a camp kettle.
Amazon Link to Pour Over Kettle
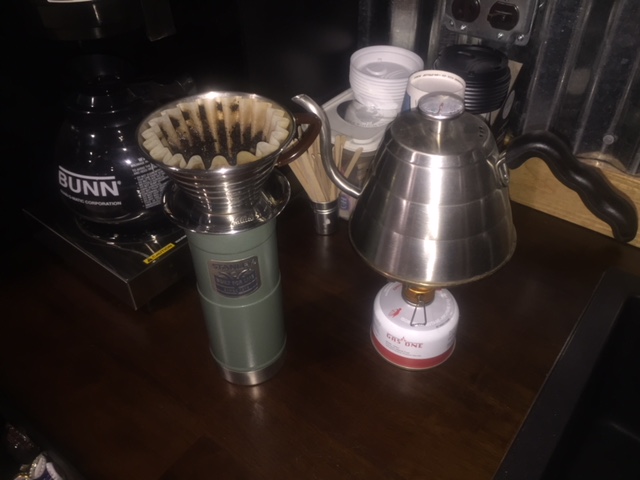
- Pour Over.JPG (74.22 KiB) Viewed 552 times
AFFECTS OF ALTITUDE
The last point on water temperature for Pour Over coffee is the altitude you are at.
If you are at sea level (1 atmosphere or 14.7psia) then water boils at 212 degrees Fahrenheit. This is way too hot and will strip all of the things in the coffee that you do not want and your coffee will be bitter. (Okay, some of us like it a little bitter but that's why this is so subjective!)
If however, you find yourself at 5,000 ft above sea level the water you boil will be exactly 203 degrees F.
Here is a chart of the various boiling points of water at different elevations.

- boiling-point-chart.png (20.93 KiB) Viewed 552 times
You can see that if you are between 5,000 ft and 9,000 ft above sea level, then hot water at its boiling point is perfect for brewing. At less than 3,000 ft you should wait until the water cools a bit before brewing your coffee.
So give the good old simple pour over a try the next time you decide on that perfect cup of coffee. All I can tell you is that after a few experiments I am now totally spoiled!