OAUSA Net May 9 - Field Antennas
Posted: Thu May 09, 2013 6:40 pm
NOTE: The product review for tonight's net (05/09/13) can be found here - viewtopic.php?f=23&t=3493
BE SAFE! Remeber, whatever you do for a field antenna be sure to safe for yourself and others around you. Erecting a field antenna can be a dangerous activity.
Even if you are not killed or injured your results could also end up on YouTube to haunt you and your family for generations to come
http://www.youtube.com/watch?v=PqmQ1CMrqkY
Below is a collection of pictures showing a some military surplus mast ideas along with a couple of military vehicles that make excellent mobile ham shacks. Following that is a more modest mast idea which is assembled from parts available at your local home center and a collection of photos showing details of a military surplus AN/GRA-50 dipole.
Here are a couple of ideas for really sturdy field antenna masts. Military surplus masts and vehicles (getting in my plug for military vehicles ) can make excellent heavy duty field operating set-ups.
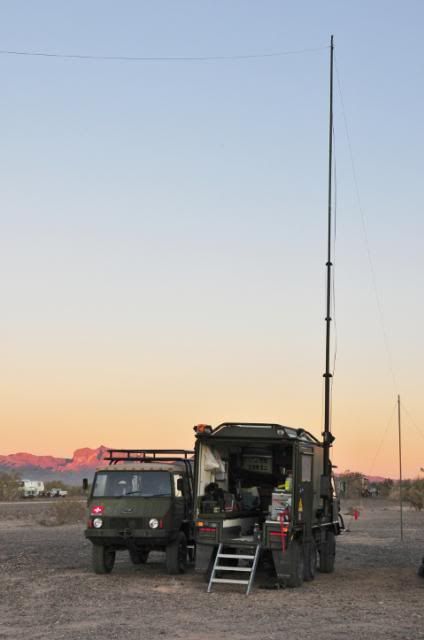
Here is a setup from the Quartzsite Hamfest earlier this year. The larger vehicle facing away from the camera is a Pinzgauer 712W (6x6 Work Box). Next to it is a Pinzgauer 710M. A Geroh model 6kmp/S crank up mast is securely attached to the custom exoskeleton on the 712W.
The antenna is a G5RV in a semi inverted V configuration. The G5RV is a popular design. Its easy to build yourself or can be purchased from a number of suppliers. This G5RV antenna design even has its own Wikipedia page -
http://en.wikipedia.org/wiki/G5RV_Antenna
On the right side of the picture in the distance you can see one of the masts used for the ends of the dipole. These are U.S. military surplus fiberglass sectional tubes. Each section is 4' and each end mast consists of 4 guyed sections. These military surplus fiberglass mast sections are easy to find and are usually very inexpensive. Just do a search on eBay or elsewhere for "military surplus fiberglass masts".
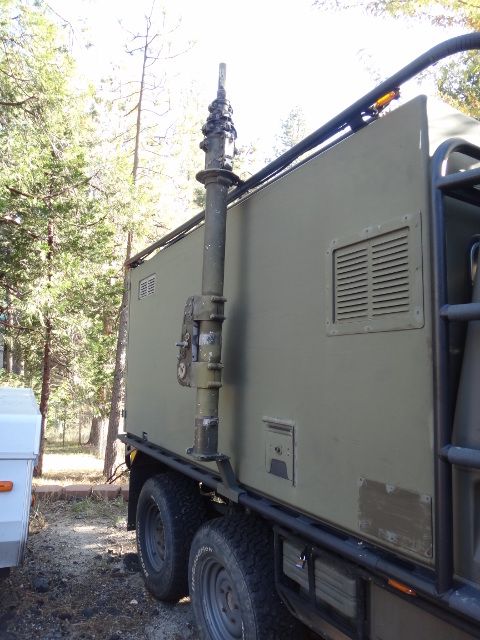
This is a closeup of the Geroh model 6kmp/S. The crank up mast is 6m tall, with 5 sections, and rated for 20kg antenna weight. The base is 105mm diameter and the top is 40mm diameter. It not only extends due to pulling cables by the crank but also that it retracts with a different set of cables; because of this it cannot get "stuck" since both the extension and retraction are powered (it is not just a gravity retraction; it will retract even with a side load that might cause it to bind). It is a very slick setup, but weighs 50kg (110 lbs). You definitely wouldn't want to leave it on the truck when running very tight trails where there is a possibility of damaging the mast.

Taking the idea of a military surplus vehicle and antenna mast one step further, here is a Land Rover 101 V.A.M.P.I.R.E. VAMPIRE is an accronym for Vehicle Army Mobile Position Interferometry Radio Equipment. I challenge anybody to come up with a better official military acronym than that!
These trucks were used for sophistcated radio direction finding among other things. Only 18 or 19 were made and 2 are known to have been destroyed. Military surplus radio trucks like the Unimogs radio trucks, Pinzgauer 710K, Volvo 303, or Land Rover VAMPIRE make great mobile operating shacks since that was their original purpose. Unfortunately, the U.S. Government no longer sells surplus vehicles to private individuals so we're pretty much limited to European trucks.
Here are some link to find more information on the Land Rover VAMPIRE -
http://en.wikipedia.org/wiki/Land_Rover ... rd_Control
http://www.oldrover.com/101/Vampire/Vampire.htm
http://autos.groups.yahoo.com/group/lan ... 01vampire/

Here is another picture showing the mast on the roof. The mast dosen't actually rise from the roof. The mast assembly slides down the back of the truck before raising.
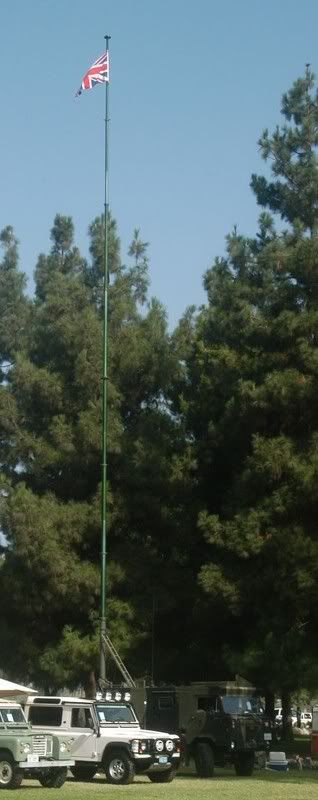
This picture shows the mast fully extended. The mast is approximately 60' tall. This is pneumatic mast which is raised by air pressure. This technique is common for commercial mobile masts. Unfortunately, I don't have any additional specs on the mast but it gives you and idea of what a heavy duty pneumatic mast is like.
BTW - If anyone is interested in a Land Rover VAMPIRE, this truck, its for sale. The owner is asking $19k which includes a collection of Clansman radio equipment. Please PM me for details.
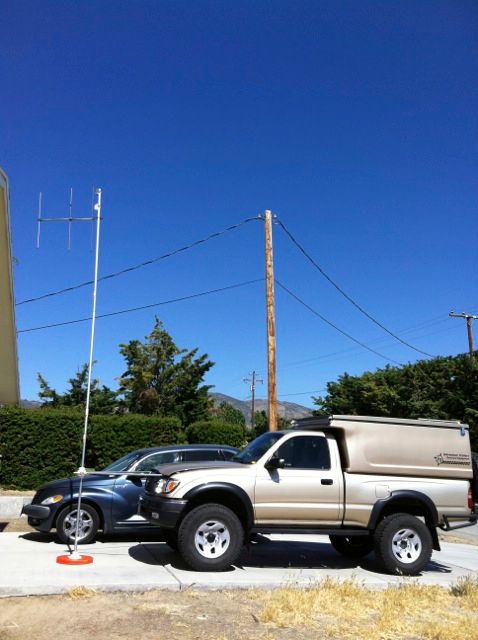
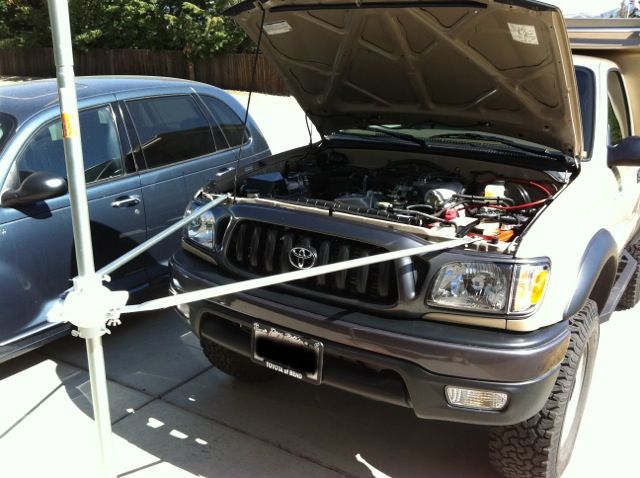
Getting back to a more practical level, here is a much more modest mast and antenna setup based on parts from my local Home Depot. Two of these masts were constructed at the last minute for an event. There was no time to order anything off of the Internet so locally available materials had to be used.
The mast is made up of interlocking aluminum concrete float handles. Each section is 6' long with an 8" overlap between sections. They snap together with spring buttons. I've used 3 sections in the configuration shown where the mast is stabilized by the truck and 4 sections free standing with guy ropes. The bases are plywood disks and have holes to anchor them with heavy duty tent stakes (The ones that look like huge nails). PVC flanges are used at the bottom and at the vehicle brace. The flanges were drilled and tapped for thumb screws which securely hold the mast tube. The braces to the truck at EMT conduit. The ends were pressed flat and drilled. Fortunately, the front cross brace in the truck already had conveniently placed holes. Bolts and wing nuts were used for quick "no tools" setup and tear down.
There are eye bolts on the top most section for guy ropes. There is also an eye bolt at the very top with a small pulley so wire antennas can be raised after the mast is erected and secured.
The antenna is a 3 element 2m Yagi from SCS. SCS was based in California but is no longer around. Similar small 2m Yagi antennas are available from companies such as Elk Antennas. This antenna has been my field antenna for about 20 years. Its built to be a field antenna so its easily assembled and broken down. Wing nuts are used so no tools are needed. I've been able to have QSOs from Catalina and Nipomo from the top of Tehachapi Mountain with a 5 watt HT and this antenna. A small beam antenna from a mountain top can really give you some incredible range.
Here is a picture showing the brace to the truck. Two PVC flanges were used back to back to make the mounting more secure.
Below are the pictures of the AN/GRA-50 antenna. These pictures can give you an idea on how to build your own multiband HF field antenna.
Here is a web site with a detailed description of the AN/GRA-50 antenna -
http://www.n2ckh.com/ANGRA50.htm
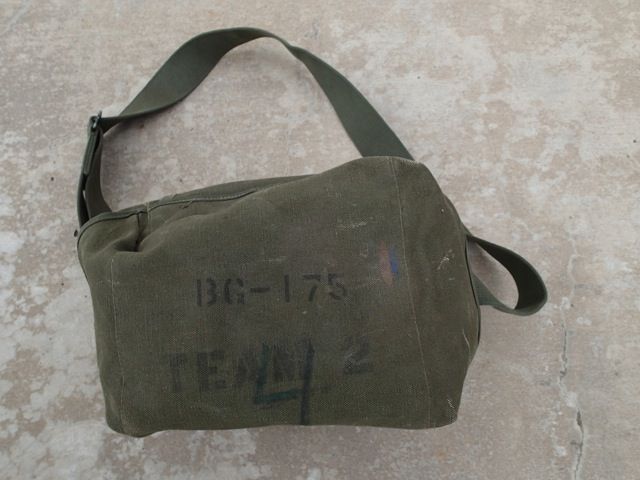
Here is how the AN/GRA-50 comes packed. The bag measures approximately 12"x9"x9" and weighs about 12lbs.
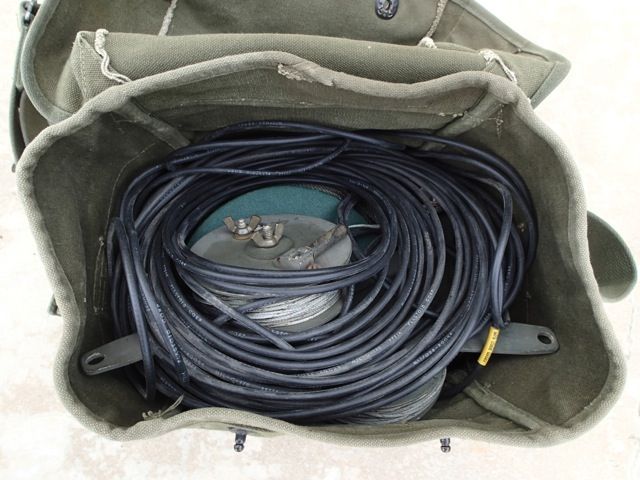
Opening the bag, you'll find all of the parts with plenty of extra room to make getting them back in easier.
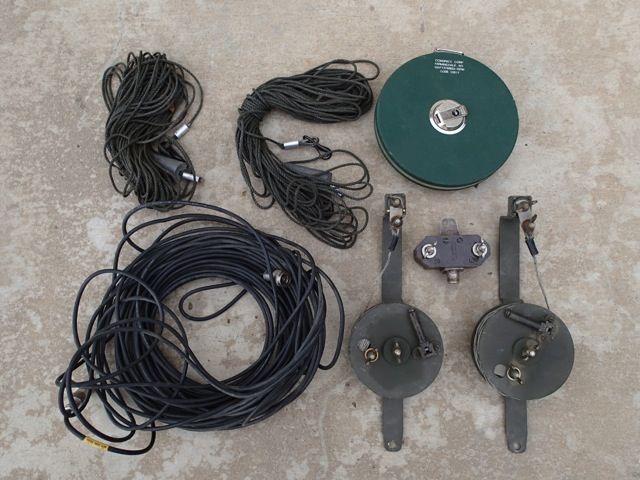
Here are the part of the AN/GRA-50 antenna laid out. The antenna itself consists of 2 reels with 156' of wire, a center insulator and coaxial cable. There are two halyards with cone shaped lead weights and a tape measure graduated in feet on one side and frequency in MC (MHz) on the other.
The AN/GRA-50 antenna is rated at 500 Watts and covers the HF bad from 1.5 to 30 MHz.
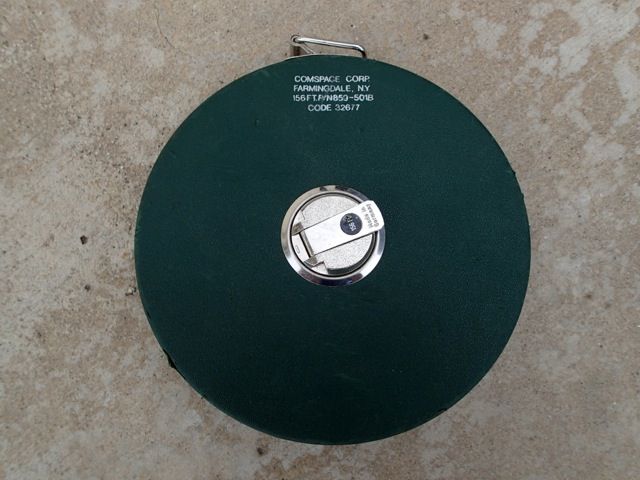
This is the 156' tape measure.
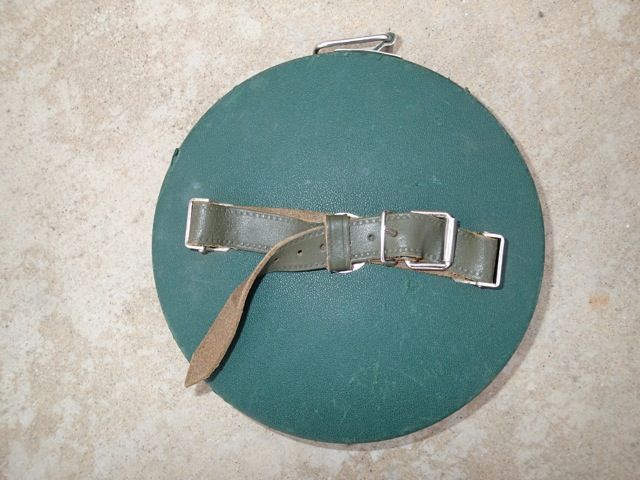
The back side of the tape measure has a leather strap so you can attach it to your hand when deploying and reeling up the tape.
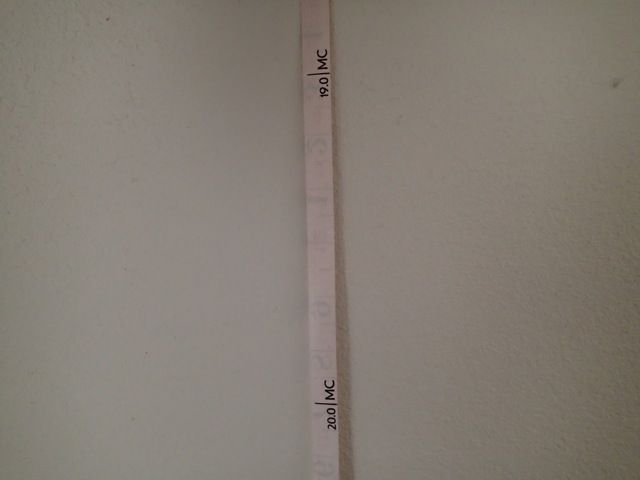
This is an example of the back side of the tape showing the graduations in frequency. If you look closely you can see the front normal graduations in feet and inches bleeding through. You can always use a standard tape measure when deploying the dipole wires using the formula Length=234/Frequency in MHz. Its easier and quicker when you have a tape already graduated in frequency.
BE SAFE! Remeber, whatever you do for a field antenna be sure to safe for yourself and others around you. Erecting a field antenna can be a dangerous activity.
Even if you are not killed or injured your results could also end up on YouTube to haunt you and your family for generations to come
http://www.youtube.com/watch?v=PqmQ1CMrqkY
Below is a collection of pictures showing a some military surplus mast ideas along with a couple of military vehicles that make excellent mobile ham shacks. Following that is a more modest mast idea which is assembled from parts available at your local home center and a collection of photos showing details of a military surplus AN/GRA-50 dipole.
Here are a couple of ideas for really sturdy field antenna masts. Military surplus masts and vehicles (getting in my plug for military vehicles

Here is a setup from the Quartzsite Hamfest earlier this year. The larger vehicle facing away from the camera is a Pinzgauer 712W (6x6 Work Box). Next to it is a Pinzgauer 710M. A Geroh model 6kmp/S crank up mast is securely attached to the custom exoskeleton on the 712W.
The antenna is a G5RV in a semi inverted V configuration. The G5RV is a popular design. Its easy to build yourself or can be purchased from a number of suppliers. This G5RV antenna design even has its own Wikipedia page -
http://en.wikipedia.org/wiki/G5RV_Antenna
On the right side of the picture in the distance you can see one of the masts used for the ends of the dipole. These are U.S. military surplus fiberglass sectional tubes. Each section is 4' and each end mast consists of 4 guyed sections. These military surplus fiberglass mast sections are easy to find and are usually very inexpensive. Just do a search on eBay or elsewhere for "military surplus fiberglass masts".

This is a closeup of the Geroh model 6kmp/S. The crank up mast is 6m tall, with 5 sections, and rated for 20kg antenna weight. The base is 105mm diameter and the top is 40mm diameter. It not only extends due to pulling cables by the crank but also that it retracts with a different set of cables; because of this it cannot get "stuck" since both the extension and retraction are powered (it is not just a gravity retraction; it will retract even with a side load that might cause it to bind). It is a very slick setup, but weighs 50kg (110 lbs). You definitely wouldn't want to leave it on the truck when running very tight trails where there is a possibility of damaging the mast.

Taking the idea of a military surplus vehicle and antenna mast one step further, here is a Land Rover 101 V.A.M.P.I.R.E. VAMPIRE is an accronym for Vehicle Army Mobile Position Interferometry Radio Equipment. I challenge anybody to come up with a better official military acronym than that!
These trucks were used for sophistcated radio direction finding among other things. Only 18 or 19 were made and 2 are known to have been destroyed. Military surplus radio trucks like the Unimogs radio trucks, Pinzgauer 710K, Volvo 303, or Land Rover VAMPIRE make great mobile operating shacks since that was their original purpose. Unfortunately, the U.S. Government no longer sells surplus vehicles to private individuals so we're pretty much limited to European trucks.
Here are some link to find more information on the Land Rover VAMPIRE -
http://en.wikipedia.org/wiki/Land_Rover ... rd_Control
http://www.oldrover.com/101/Vampire/Vampire.htm
http://autos.groups.yahoo.com/group/lan ... 01vampire/

Here is another picture showing the mast on the roof. The mast dosen't actually rise from the roof. The mast assembly slides down the back of the truck before raising.

This picture shows the mast fully extended. The mast is approximately 60' tall. This is pneumatic mast which is raised by air pressure. This technique is common for commercial mobile masts. Unfortunately, I don't have any additional specs on the mast but it gives you and idea of what a heavy duty pneumatic mast is like.
BTW - If anyone is interested in a Land Rover VAMPIRE, this truck, its for sale. The owner is asking $19k which includes a collection of Clansman radio equipment. Please PM me for details.

Getting back to a more practical level, here is a much more modest mast and antenna setup based on parts from my local Home Depot. Two of these masts were constructed at the last minute for an event. There was no time to order anything off of the Internet so locally available materials had to be used.
The mast is made up of interlocking aluminum concrete float handles. Each section is 6' long with an 8" overlap between sections. They snap together with spring buttons. I've used 3 sections in the configuration shown where the mast is stabilized by the truck and 4 sections free standing with guy ropes. The bases are plywood disks and have holes to anchor them with heavy duty tent stakes (The ones that look like huge nails). PVC flanges are used at the bottom and at the vehicle brace. The flanges were drilled and tapped for thumb screws which securely hold the mast tube. The braces to the truck at EMT conduit. The ends were pressed flat and drilled. Fortunately, the front cross brace in the truck already had conveniently placed holes. Bolts and wing nuts were used for quick "no tools" setup and tear down.
There are eye bolts on the top most section for guy ropes. There is also an eye bolt at the very top with a small pulley so wire antennas can be raised after the mast is erected and secured.
The antenna is a 3 element 2m Yagi from SCS. SCS was based in California but is no longer around. Similar small 2m Yagi antennas are available from companies such as Elk Antennas. This antenna has been my field antenna for about 20 years. Its built to be a field antenna so its easily assembled and broken down. Wing nuts are used so no tools are needed. I've been able to have QSOs from Catalina and Nipomo from the top of Tehachapi Mountain with a 5 watt HT and this antenna. A small beam antenna from a mountain top can really give you some incredible range.

Here is a picture showing the brace to the truck. Two PVC flanges were used back to back to make the mounting more secure.
Below are the pictures of the AN/GRA-50 antenna. These pictures can give you an idea on how to build your own multiband HF field antenna.
Here is a web site with a detailed description of the AN/GRA-50 antenna -
http://www.n2ckh.com/ANGRA50.htm

Here is how the AN/GRA-50 comes packed. The bag measures approximately 12"x9"x9" and weighs about 12lbs.

Opening the bag, you'll find all of the parts with plenty of extra room to make getting them back in easier.

Here are the part of the AN/GRA-50 antenna laid out. The antenna itself consists of 2 reels with 156' of wire, a center insulator and coaxial cable. There are two halyards with cone shaped lead weights and a tape measure graduated in feet on one side and frequency in MC (MHz) on the other.
The AN/GRA-50 antenna is rated at 500 Watts and covers the HF bad from 1.5 to 30 MHz.

This is the 156' tape measure.

The back side of the tape measure has a leather strap so you can attach it to your hand when deploying and reeling up the tape.

This is an example of the back side of the tape showing the graduations in frequency. If you look closely you can see the front normal graduations in feet and inches bleeding through. You can always use a standard tape measure when deploying the dipole wires using the formula Length=234/Frequency in MHz. Its easier and quicker when you have a tape already graduated in frequency.