Page 1 of 1
OAUSA Net - April 3, 2014 –Session #3 of Radio Install
Posted: Wed Mar 19, 2014 8:59 am
by toms
NOTE: OAUSA Net - April 3, 2014 –Session #3 of the 3-20-14 Ham Mobile Radio Install net
A good, clean, neat installation of your mobile radio will ensure years of noise free operation. Every vehicle presents new problems for antenna placement, power pickup, and radio installation. We invite you to share good practices, tips, techniques, and clever solutions from your experience with mobile radio installs.
Product Spot Light
I am a big fan of incorporating a RIGrunner distribution block from West Mountain Radio in my mobile radio vehicle installs. The model 4005 with 5 outlets is small enough to fit easily into the vehicle (6x3 inches x 1.4 thick) and give me one more outlet in the same space as the 4004 model (unless you need a USB port). I like the idea that that as I discover the need for more radios I didn’t know I couldn’t live without, I already have a clean power source to plug into. The use of30 amp powerpoles makes it easy for others to tap into the power if they need to.
This model will handle up to 40 amps and each outlet is separately fused. While they expected you will use the powerpole on the end for power in, any of the powerpoles can be used for power in or out.
http://www.westmountainradio.com/rigrunner.php
Don’t forget to order a bag of Anderson powerpoles. And get the crimper – it will save you a lot of grief.
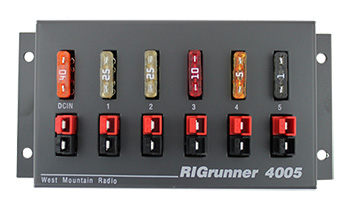
- RIGrunner 4005
- RIGrunner.jpg (24.46 KiB) Viewed 3978 times
As we continue our discuss a second week, you might find that you have limited space and are willing to give up the individual fuse block
for a compact and cheaper way to connect all your radios. The Red-Dee-2 Connect is made by Power Werx and cost under $30. Any of the 8 powerpoles can be used for power in and the other 7 for power out. It is about 2" by 1 3/4" by 1" thick. You can buy 4 way and 6 way blocks also
http://www.powerwerx.com/powerpole-power-distribution/
Re: OAUSA Net - March 20, 2014 –Ham Mobile Radio Install
Posted: Thu Mar 20, 2014 3:30 pm
by Ken Woodford
That is a neat little electronic gadget. It sure would help in installing anything 12 volt..
Ken
Re: OAUSA Net - March 27, 2014 –Continuation of Radio Install
Posted: Thu Mar 27, 2014 10:52 am
by toms
This is the first of many steps in installing my 8800 in a 1998 Jeep Wrangler TJ.
The goal is to find a place to mount the remote head.
I found two screws behind the ash tray and cut an 18 gauge piece of tin to drop down and over to provide a place to mount the head. Only the lower part of the tin was painted black.
I have used this method on several other vehicles. Each vehicle is different but you can normally find away to build a bracket.
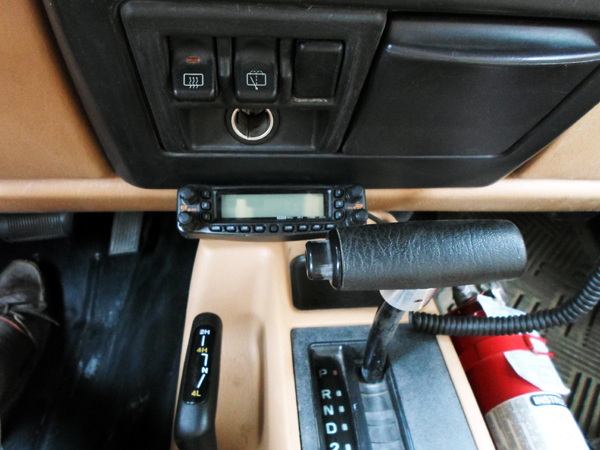
- Finished look for the remote head mount
- SAM_2152m.jpg (209.77 KiB) Viewed 3857 times
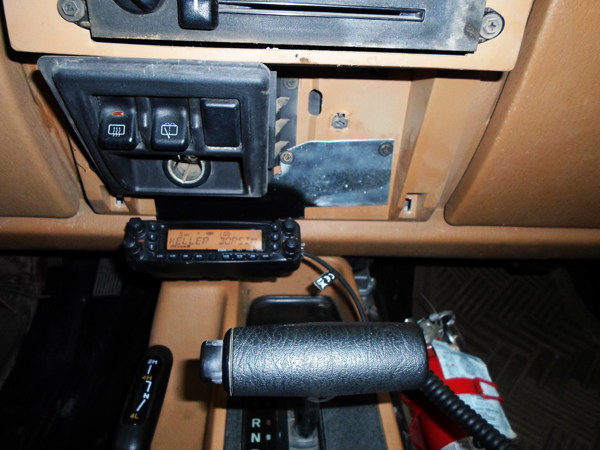
- A look behind - how the tin plate was attached
- SAM_2154m.jpg (221.14 KiB) Viewed 3857 times
Here is another approach. Showing only the tin plate the head is bolted to
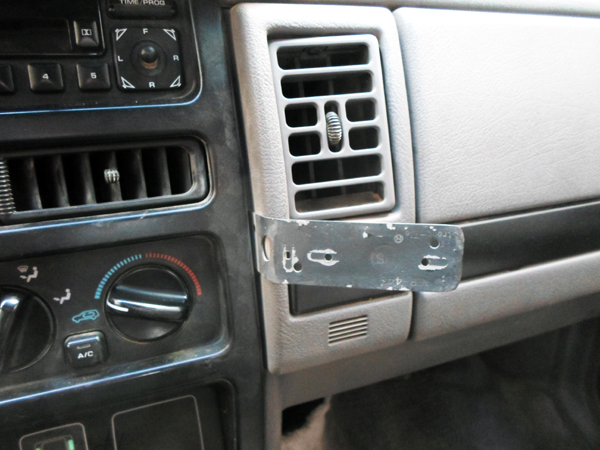
- Floated the head out over the dash
- SAM_2162m.jpg (202.01 KiB) Viewed 3839 times
Re: OAUSA Net - March 27, 2014 –Continuation of Radio Install
Posted: Thu Mar 27, 2014 2:22 pm
by DaveK
PRODUCT SPOTLIGHT
In keeping with our topic for this second half of the Ham Radio installation net, here are some products and websites we wanted to spotlight:
1. Having an antenna analyzer can be very helpful in diagnosing problems and finding a solution. The long time favorite is the line of analyzers from MFJ. In particular, the MFJ-259C is the top selling unit on the market. It goes for about $260.00 and is available from almost every Ham store. See:
http://www.mfjenterprises.com/Product.p ... d=MFJ-259C.
From the MFJ website:
The MFJ-259C gives you a complete picture of your antenna’s performance. You can read your antenna’s SWR and Complex Impedance 530 KHz to 230 MHz continuously with no gaps.
Here’s what you can do
Find your antenna’s true resonant frequency. Trim dipoles and verticals.
Adjust your Yagi, quad, loop and other antennas, change antenna spacing and height and watch SWR, resistance and reactance change instantly. You’ll know exactly what to do by simply watching the display.
Perfectly tune critical HF mobile antennas in seconds for super DX -- without subjecting your transceiver to high SWR.
Measure your antenna’s 2:1 SWR bandwidth on one band, or analyze multiband performance.
Check SWR outside the ham bands without violating FCC rules.
Take guesswork out of building and adjusting matching networks and baluns.
Accurately measure distance to short or open in failed coax. Measure length of a roll of coax, coax loss, velocity factor and impedance.
Measure inductance, capacitance. Troubleshoot and measure resonant frequency, Q of traps, stubs, transmission lines, chokes, tuned circuits, baluns.
Adjust your antenna tuner for a perfect 1:1 match without creating QRM.
MFJ-259C is a complete ham radio test station with frequency counter, RF signal generator, SWR/Resistance/Reactance/Coax Analyzer, Capacitance/Inductance Meter and much more!
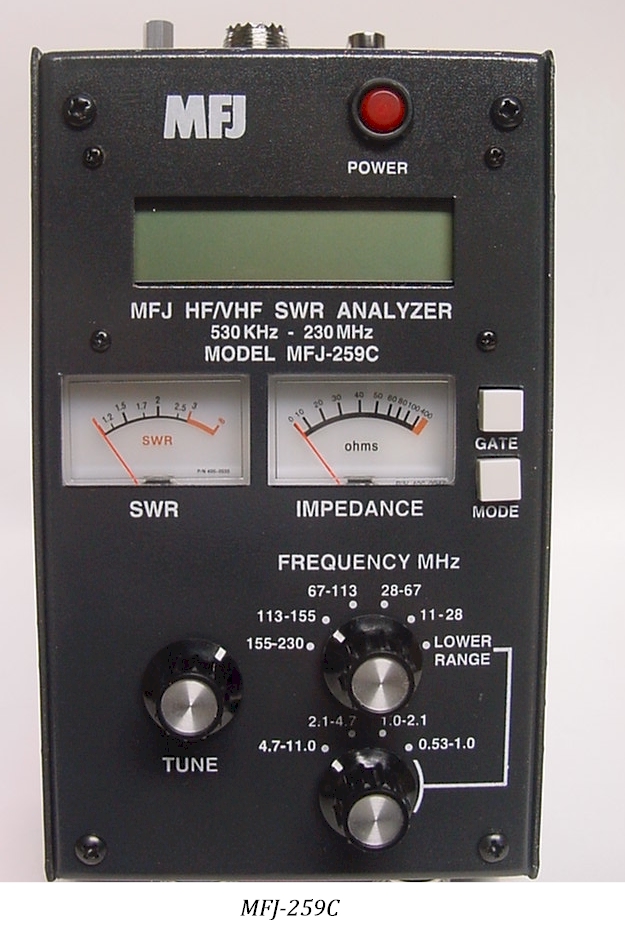
- MFJ-259C.jpg (352.56 KiB) Viewed 3831 times
2. Every part of your Ham set up is important, but an often overlooked component is your coax cable. Coax does not have an unlimited life and the more it is used, especially if it is used outdoors or deployed and stored frequently, the shorter it's life becomes. There are many brands of coax that offer superior performance, but I have found and used one in particular that has withstood the hard use and exposure that my mobile sees regularly. The cable designation is RG-142 and is sold by several manufacturers. I have used CableXperts as my source and have not been disappointed. The cable is MIL Spec-C-17G compliant and is made for hard use and extreme environments.
CableXperts website:
http://www.cablexperts.com/cfdocs/cat.c ... ship=1&c=0
You Tube video:
http://www.youtube.com/watch?v=tERqorT2 ... ature=plcp
Specs on RG-142:
http://www.awcwire.com/productspec.aspx ... xial-cable
Re: OAUSA Net - April 3, 2014 –Session #3 of Radio Install
Posted: Thu Apr 03, 2014 12:53 pm
by toms
Product Spot Light
On the first net we talked about drilling holes through the firewall and the need to put a grommet in the hole to protect the wire.
Here is a neat product from Daystar that protect the wire and gives you access to different sizes.
http://www.daystarweb.com
Re: OAUSA Net - April 3, 2014 –Session #3 of Radio Install
Posted: Thu Apr 03, 2014 5:37 pm
by DaveK
Mobile operation of your Ham radio equipment carries a different set of concerns than presented by base stations or HTs. When we are on the trail, away from shore power, you need to give special attention to the power source. Keying down on a 50 watt mobile transceiver can draw 10 to 15 amps and a 100 watt HF rig can draw 20 or more amps. Enjoying long QSOs is fun but it can take a toll on your battery. The time to find out what condition your battery is in is not when its time to leave camp.
Monitoring the battery is simple and inexpensive and there are many ways to do this. One way is to install a small voltage gauge on the dash, near the radio(s) so you can monitor what your QSOs are doing. A good meter, conveniently mounted (permanently) is an excellent solution. The Daytel Company makes a full line of meters, in several sizes and colors. I selected the meter, below, and located it on a convenient space on the dash. It draws very little power when in the "on" position. One side benefit to a meter is that it also can help you monitor the condition of the battery when other accessories are in use, such as computers, refrigerators, chargers, compressors......................................
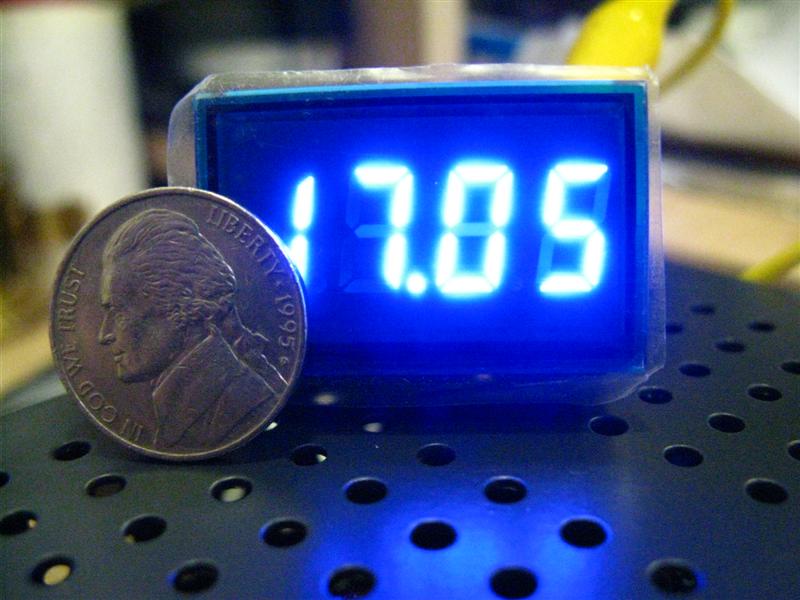
- IMG_1132 (Medium).JPG (66.42 KiB) Viewed 3727 times
Here is the installation. I installed an on/off switch which is located to the left of and below the meter. In the event that the light is distracting, especially at night, it can be easily switched off. So far, it has never proven to be a distraction.
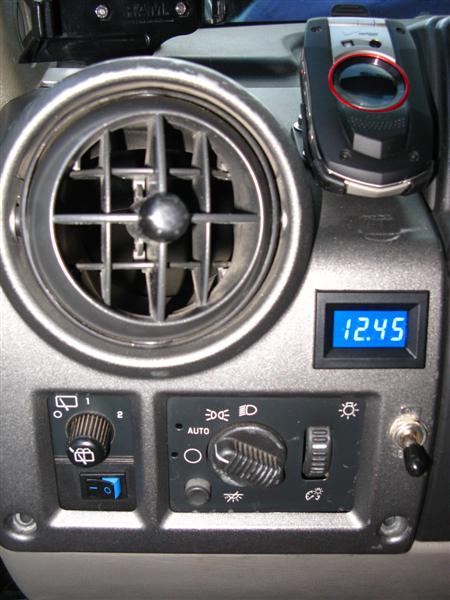
- Daytel volt meter.JPG (54.01 KiB) Viewed 3727 times
Re: OAUSA Net - April 3, 2014 –Session #3 of Radio Install
Posted: Thu Apr 03, 2014 9:05 pm
by BriGuy
While I am listening to the net figured I would share my install of 8800 in 2007 JK.

Faceplate and mic mounted really nicely to rugged ridge dash tray system.
http://amzn.com/B002ZYQ1WA

NMO Mount intended for a dodge truck, required a bit of trimming on the inside edge but works well and is stable especially with addition of 90 bracket.

Jeep has hole through firewall filled with foam, taped antenna and power wires to straightened hanger and fed right through.

Plenty of room behind pillar panels for cable runs and added external speaker for better audio.

Removed seat to install base unit, pulled up carpet and glued wood panel backed with blind nuts to floor pan, put carpet back over wood and bolted everything down, very stable and plenty of air flow.


Very happy with install, this was my first try, although years ago I installed a few car stereos so I guess that experience helped a bit.

Re: OAUSA Net - April 3, 2014 –Session #3 of Radio Install
Posted: Fri Apr 04, 2014 9:12 am
by toms
BriGuy,
Nicely done. I like the head mount. Looks like an easy install. The antenna solution would work well for some of the older Jeeps too that do not have a clean edge on the hood for a lip mount antenna. Do you get any engine or alternator noise with the antenna in that location?
Re: OAUSA Net - April 3, 2014 –Session #3 of Radio Install
Posted: Sat Apr 05, 2014 6:42 am
by BriGuy
toms wrote:BriGuy,
Nicely done. I like the head mount. Looks like an easy install. The antenna solution would work well for some of the older Jeeps too that do not have a clean edge on the hood for a lip mount antenna. Do you get any engine or alternator noise with the antenna in that location?
No noise at all with antenna in that location, power wires run directly to battery which I am told helps. Don't recall exact SWR but had it checked at Ham Radio Outlet and was told it is very good. I choose that location because I heard the spare mount on the back can cause problems and it was a much easier cable run. Also with a 40" antenna it is exactly 7' tall allowing me to pull into my garage without removing.
Here is the antenna I am using.
http://www.cometantenna.com/products.ph ... childID=34
Re: OAUSA Net - April 3, 2014 –Session #3 of Radio Install
Posted: Sat Apr 05, 2014 4:51 pm
by DaveK
BriGuy wrote:While I am listening to the net figured I would share my install of 8800 in 2007 JK.
That Dash Organizer really adds a nice touch and apparently more room to mount and store things. It would be nice if they made that for other vehicles.