The Compass
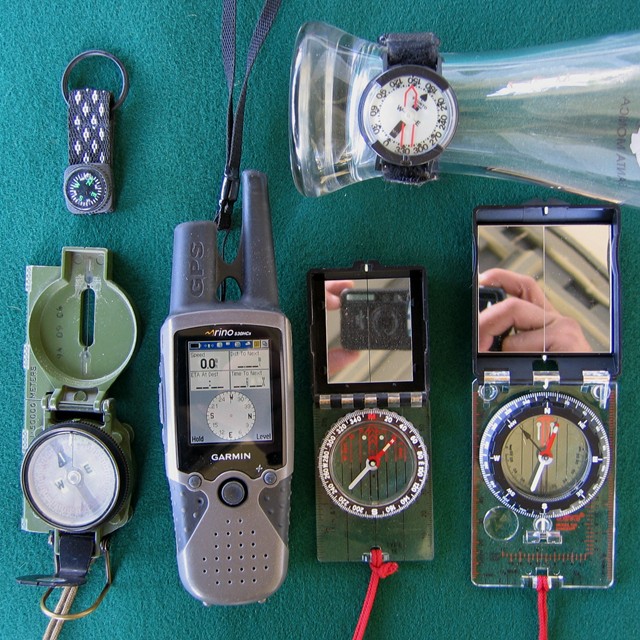
- A lot of choices.
- Map Compass 640 03.JPG (165.11 KiB) Viewed 5799 times
1. REI’s how to choose a compass:
http://www.rei.com/learn/expert-advice/compass.html
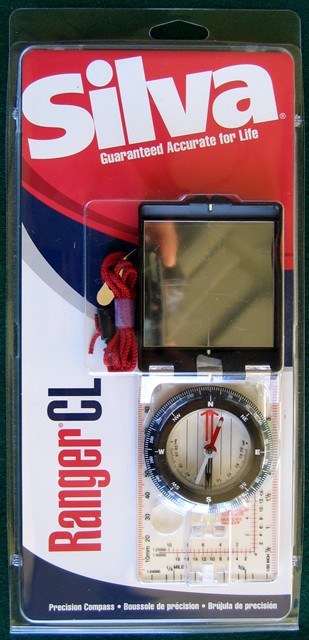
- Silva Ranger CL.
- Map Compass 640 01.JPG (76.02 KiB) Viewed 5799 times
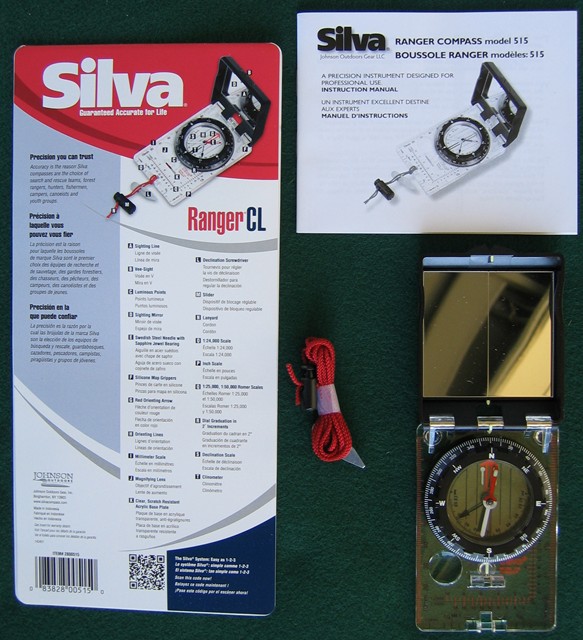
- Silva Ranger CL unpacked.
- Map Compass 640 02.JPG (121.75 KiB) Viewed 5799 times
A. Basic, advanced and “accessory” compasses:
1) Basic (good) will have bezel ring with graduated markings, sometimes only cardinal directions, but not much more than that.
2) Advance compass (better and best models) comes with things like a mirror, aiming features, magnifier and scales but the biggest features may include a clinometer and declination feature.
3) The “accessory” compass (avoid like the plague) are rudimentary; the type you might find attached to a zipper pull, key fob or a gimmicky “survival knife.”
B. What does this mean to the average navigator?
1) There are several types of compasses. There are even electronic compasses and they all have limitations.
a. Electronic compasses need batteries and on the higher end GPS units are good but they may not be very good for working hand in hand with a map like you can with a base plate compass.
b. All compasses are affected by metal and electrical fields of energy. Although this is true we still used them to “follow along” (compass and map) during an insertion just to double up and insure we were not being dropped in the wrong place. Believe me, it is easier to fly or ride to the right place than it is to correct several kilometers or miles of mistaken location.
c. Storage is also a very big concern. You want to make sure that where you store your compass there are few “demagnetizing” concerns. In your all metal tool box or on top of a stereo speaker with large magnets is not the right place. If the compass is sensitive enough to seek out magnetic north thousands of miles away, believe me, you do not want a compass that will not do that properly because of improper storage (what about the demagnetizer at the store checkout?). I usually hang my compasses from their lanyard in a place away from metal or other magnets so they have “free air” around them.
d. Things to look out for:
(1) Dreaded bubbles in a liquid filled compass.
(2) A compass that has a “locking” needle. Sometimes the locking feature drags on the needle; be sure you have a free rotating needle when taking readings.
(3) An erratic needle due to a degraded bevel rotation point.
(4) Lost calibration. Quick check? Mark a waypoint or find a noteworthy distant point and shoot an azimuth to that point (e.g., Google Earth from your position to a few peaks). Is it within a few degrees? Check several points, does the reading differ by +/- the same degree every time? Something to consider when using that specific compass. We always used a straight edge that was calibrated to a surveyed direction, but who has that luxury? Use a post with several other compasses and see if there are any large discrepancies.
2. How to use a compass:
A. Centerhold: Holding the compass level at waist level you cradle it between your left and right hand as if shooting a handgun from waist using one finger as your pointing finger. This technique allows for the following:
1) Fast and easy.
2) Can be used during all conditions of visibility.
3) Used over all kinds of terrain.
4) Requires you watch that there are no metal objects near the compass as you conduct your azimuth check.
5) Does not require you remove your wire framed glasses.
B. Compass-to-Cheek:
1) Sighting ahead to a distant point allows you to walk to that point without constantly checking your azimuth.
2) This allows you to stay focused on the terrain and your environment and not constantly checking your compass.
3) Turn your whole body in the direction of the desired azimuth. Do not rotate your shoulders.
Putting it all together.
1. You want to get somewhere and with all the pieces they need to come together on paper, on your GPS, in your software and most importantly on the ground. How is that going to happen?
2. My technique:
A. Internet, map and satellite reconnaissance where I check for anything I can find concerning the places and points of interest I plan to visit. For instance, wheeled vs. by foot.
B. Understanding the difference between one source document and another can be complicated and knowing which datum and which “north” is used; imperative.
C. Understanding the contour interval can make or break your trip.
D. Know that the easy route may sometimes be the best route and the best route might be the longer route. Following your GPS can be a huge mistake and this is where your map or downloaded topo can really make a difference.
E. Time and distance. Give yourself plenty of time. Haste and improper planning are the mother of mistake.
3. I plot the traveled surface road using the normal methods like Google Map.
4. I check to see how far I can take that form of plotting and I decide which changes in direction will be a problem. I plot the points in Google Earth and use the following techniques learned over several years of trial and error to decide where my waypoints need to go. Always think in terms of primary and alternate routes; every plan must have contingencies.
5. Then I collect or print the graphics that will best suit travel between the start and finish.
A. Road map or atlas.
B. Topographic maps.
C. Satellite imagery.
D. GPS downloaded graphics.
E. Timeliness of the source documents.
6. Understand how distance and time are all part of a “getting there in one piece” continuum because leaving enough time, food, fuel or other finite pieces of the puzzle may make the difference in some cases between success or a bad outcome.
7. Techniques to use:
A. Handrail linear features whether they be water, land or manmade.
B. Offset on your intended point which gives you a solid understanding which direction your desired point will be; left or right face (?) when you get to the point of direction change or trying to pinpoint your POI.
C. “Box yourself in” by knowing what features bring you close, which features let you know you have gone too far and which features keep you from moving to far left/right.
D. Check your map and understand your position within a mile while driving and within two football fields when traveling by foot.
E. Understand what SOS-ES and what that might mean to you where the rubber meets the road or boots hit the trail.
F. A “panic azimuth” is always a good idea. A direction that brings you out to help whether that is a well traveled road, river or trail. Even if you have a way to communicate, as a ham, you better plan for no-commo.
G. Let others know what you are doing and give them your idea of what you will do if you do not make contact within the prescribed time. This is for those time when what you do on the trail is for keeps.
How to get better at this.
1. Find someone to do this with who is of equal conditioning or even a little less in shape. A fit person with mild patience may become frustrated and fail to let you work while they teach, coach and mentor. You may see that fellow person lead the way because they are no longer engaged with your training.
2. Go short and easy. I used to set my course for objects I found on the map when I got bored of sitting around camp. Manmade objects like mine symbols, springs and buildings that may or may not exist anymore made each event a mini adventure.
3. What you need to train on and what tools are available to you.
A. Study on the internet.
B. Learn to understand how to read a map.
C. Get better with your compass and map by using them.
D. Build on your skills; do not simply go for broke.
E. Learn as you go; understand what you are looking at when out in the wilderness.
4. Understand your limitations:
A. Are you conditioned to be a trail driver/walker;
B. Or, will you explore the path less traveled?
C. Know that there are serious consequences once you make poor choices and that these choices are like pulling a lose string on a sweater; it only gets worse the more you pull the string.
D. Use proven gear. Sometimes the gadgets we depend on are less dependable then we think and it does not take much to fall victim to being one dimensional when it comes to navigation rather than being multi-faceted.
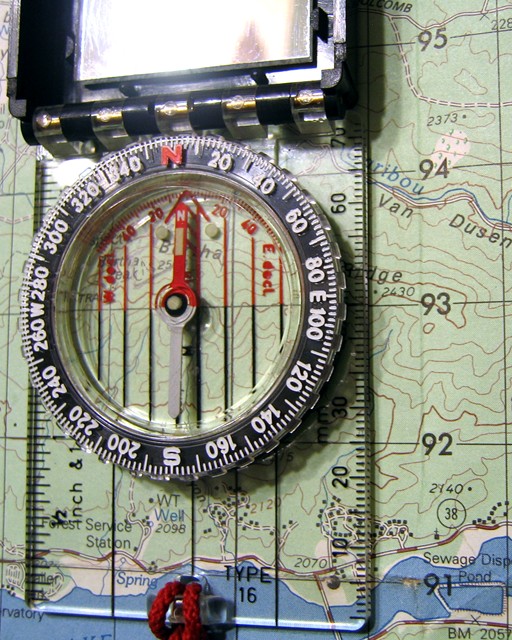
- Checking for serviceability.
- Map Compass 640 04.JPG (106.58 KiB) Viewed 5799 times
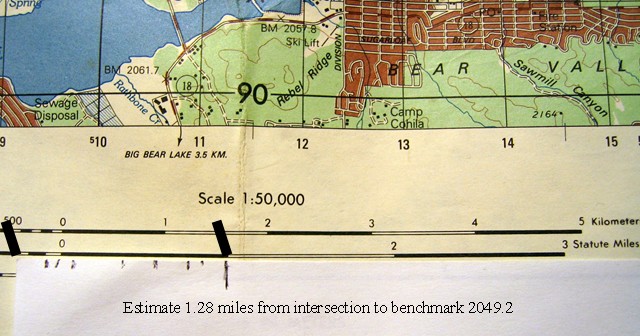
- Straight line distance.
- Map Compass 640 05.JPG (95.92 KiB) Viewed 5799 times
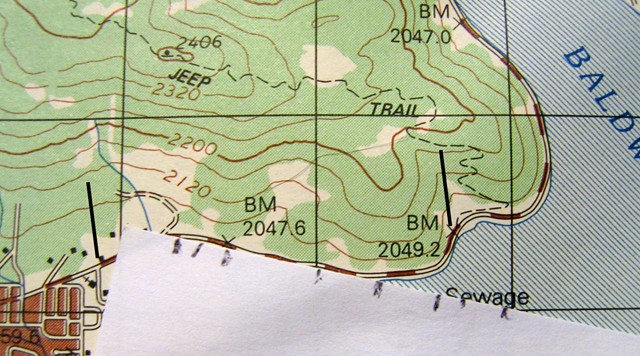
- Working a curved rather than a linear distance.
- Map Compass 640 06.JPG (111.12 KiB) Viewed 5799 times
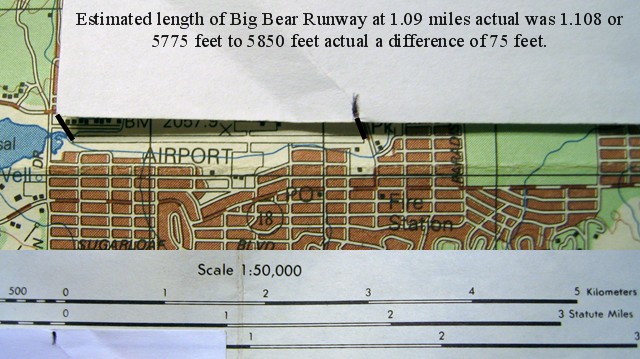
- Distance in miles.
- Map Compass 640 07.JPG (91.56 KiB) Viewed 5799 times
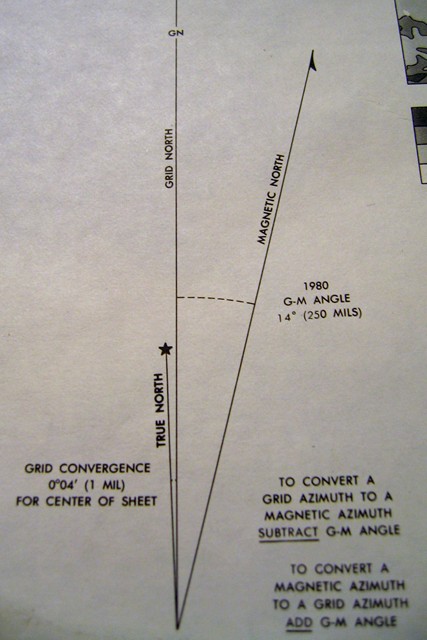
- Declination diagram.
- Map Compass 640 08.JPG (68.91 KiB) Viewed 5799 times
- Orient your map either grid north or magnetic north depending on what you are solving for.
- Map Compass 640 09.JPG (150.01 KiB) Viewed 5799 times
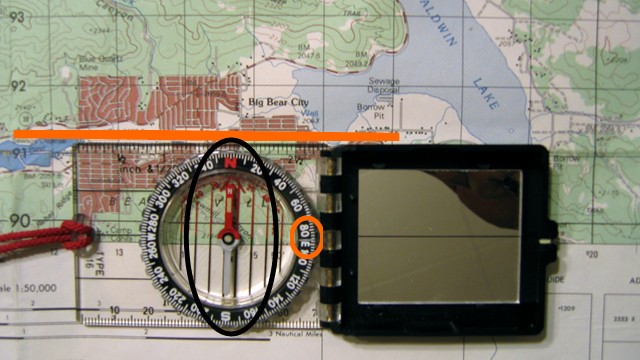
- Rotate bezel ring to find the grid azimuth of Big Bear air strip (90 degree grid, 74 degree Mag)
- Map Compass 640 10.JPG (81.24 KiB) Viewed 5799 times
Good luck, see you on the trail!