Some people really appreciate a really good gourmet cup of coffee in the morning whether it's espresso, cappuccino, latte, an Americano or whatever their favorite hot coffee house drink may be. Some people have significant others who can't get by without their morning speciality coffee drink. And some just like the challenge of preparing something unexpected while camping out on the trail.
Personally, I like one good strong cup of coffee in the morning and the latter reason above. I've tried a couple of different stovetop espresso makers one of which steams milk as the coffee is brewing making cappuccinos or lattes but I was never satisfied with the taste compared to coffee house drinks or something from a good home machine.
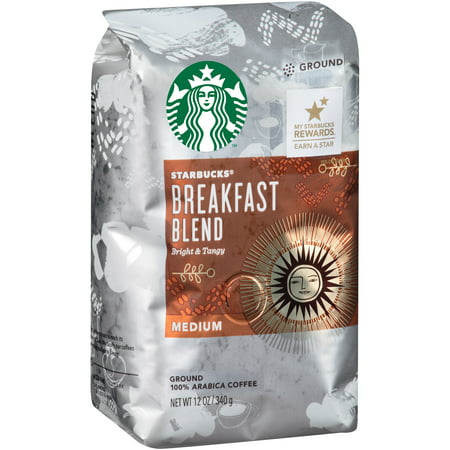
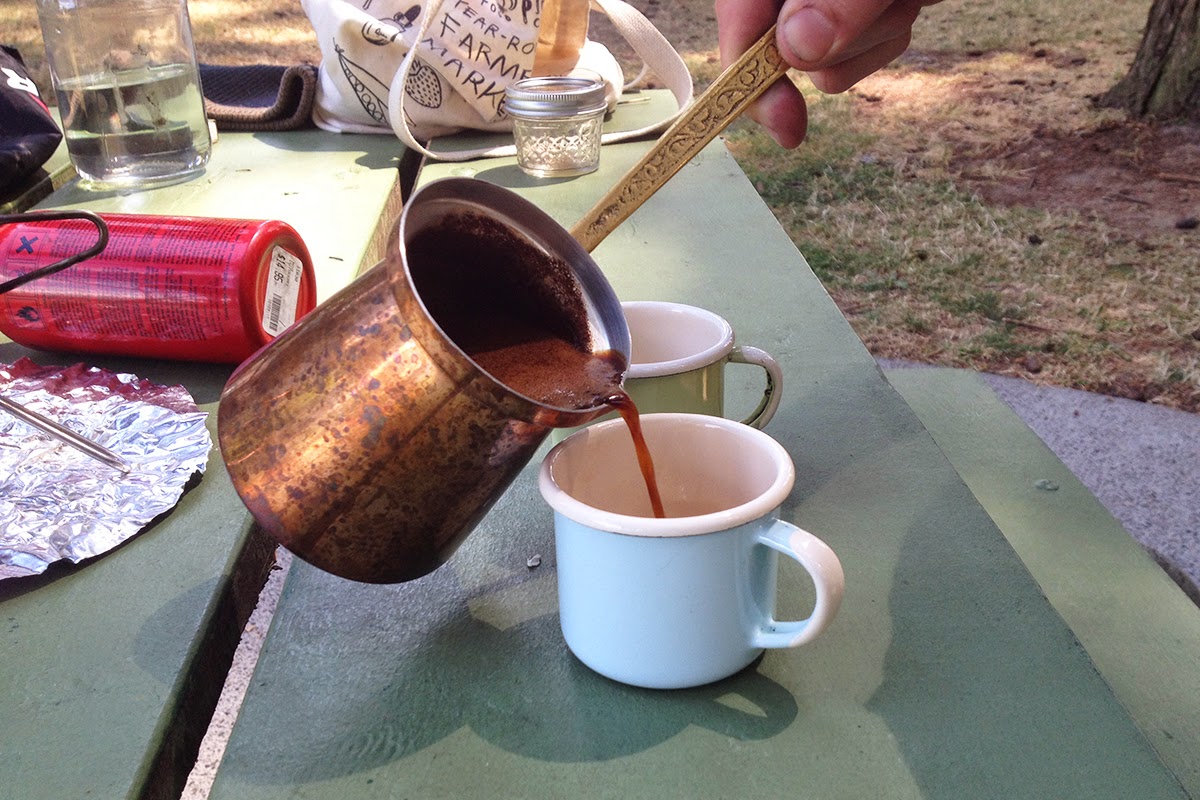
My first camping coffee maker was a generic stove top espresso maker. Technically it makes cafe rapid since the water is forced through the coffee by steam pressure rather than being pumped.
- Basic Stove Top Espresso Maker
- DSC_0213.jpg (267.1 KiB) Viewed 30458 times
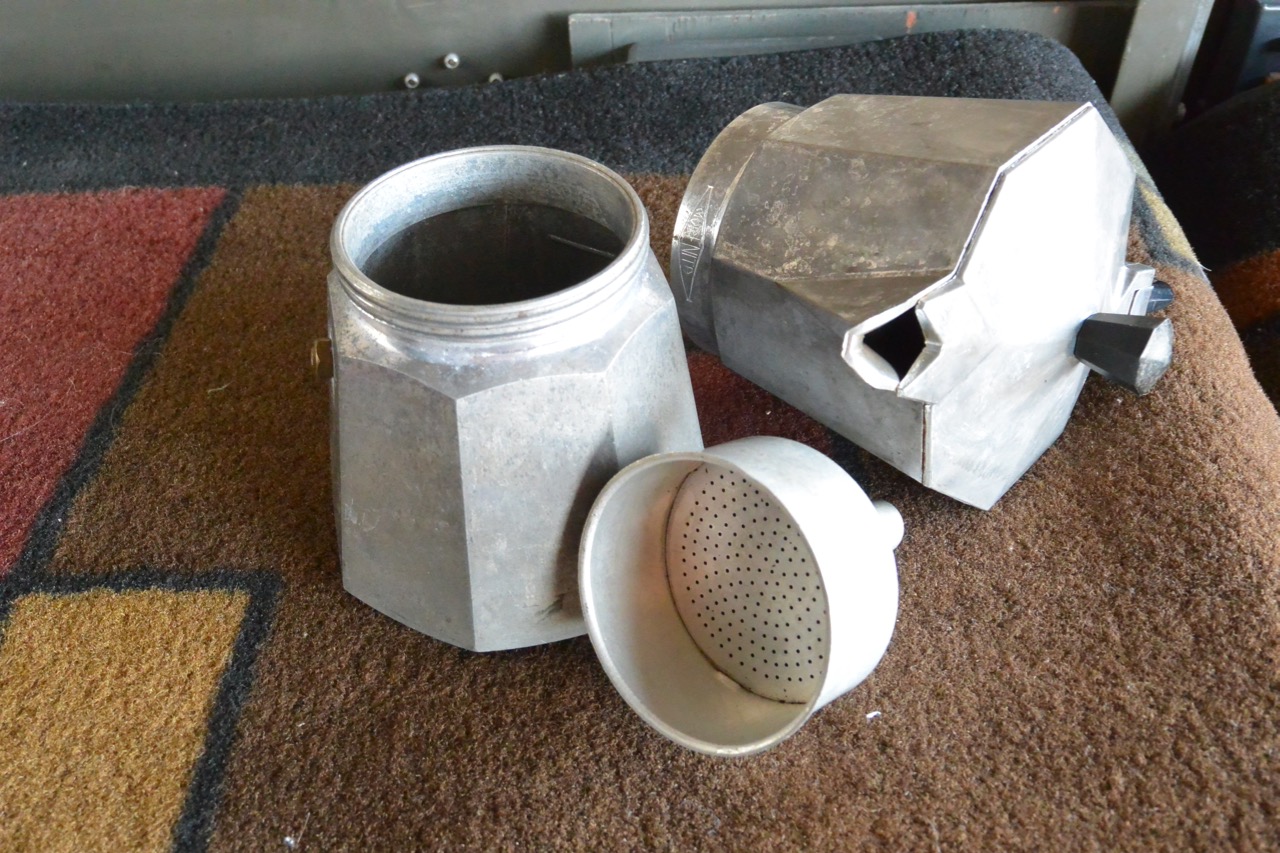
- Basic Stove Top Espresso Maker Disassembled
- DSC_0218.jpg (339.82 KiB) Viewed 30458 times
These are available for anywhere from $10 to $40 depending on how fancy you want to get or if you want to pay for a brand name. You fill the bottom section with water to a marked line and fill the basket with finely ground coffee, put everything together and place it on the burner. Once the water starts to boil it forces hot boiling water up through the grounds and into the top section. You need to watch over it so it doesn't boil dry when finished. This makes one VERY strong cup of coffee which can be on the harsh side but you can acquire a taste for it.
My next step up was to a Bialetti Mucca Express after seeing one that another person had on a group off road camping trip to Johnson Valley.
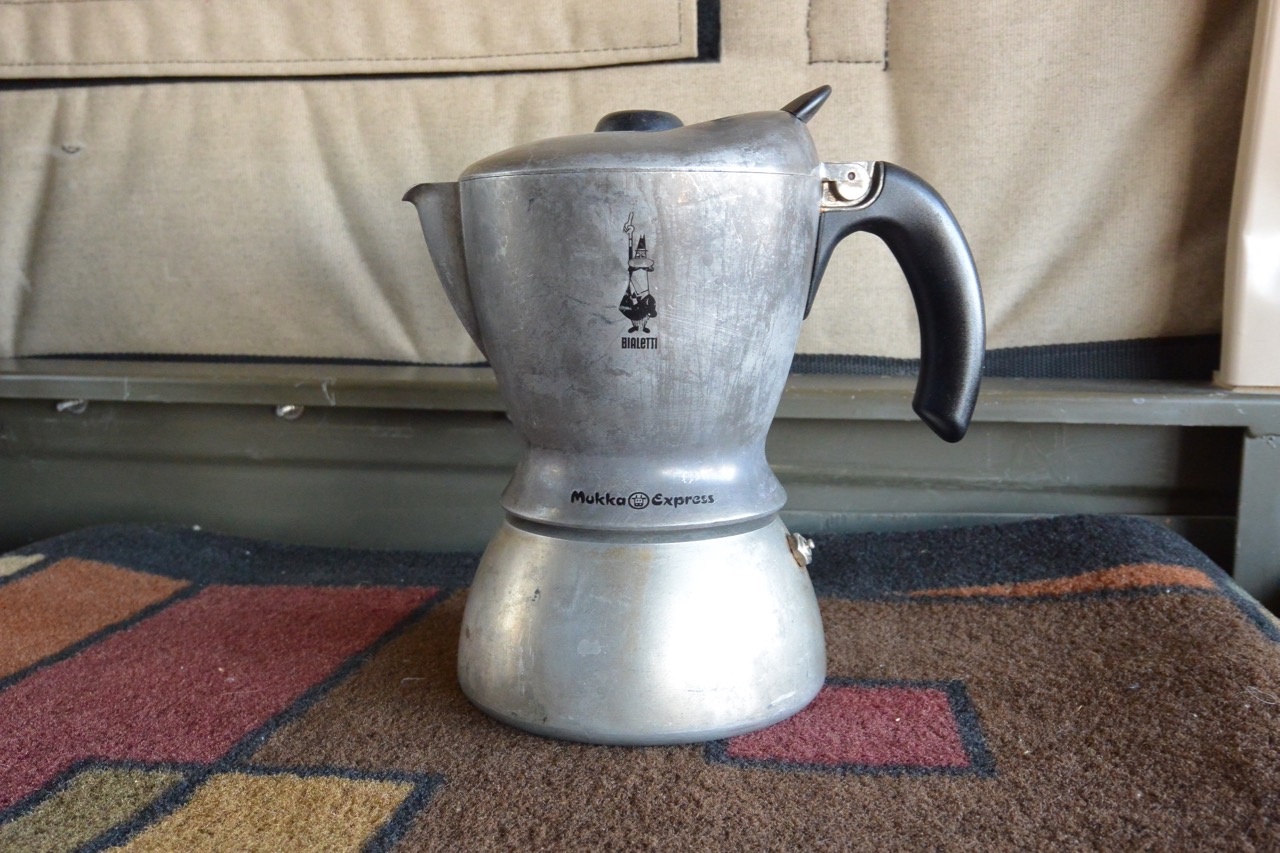
- Bialetti Mucca Express
- DSC_0208.jpg (284.79 KiB) Viewed 30458 times
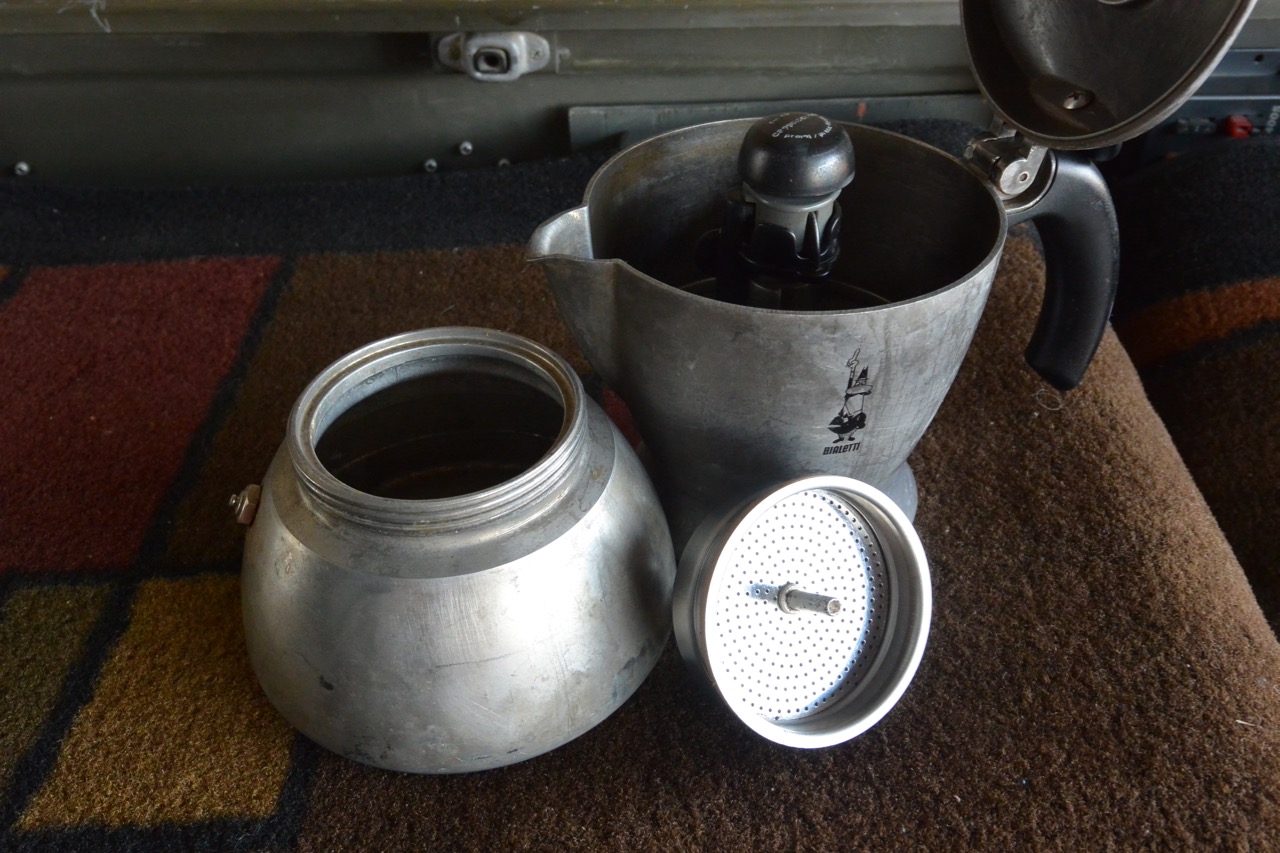
- Bialetti Mucca Express Disassembled
- DSC_0226.jpg (271.82 KiB) Viewed 30458 times
This takes the stove top espresso maker one step further by adding a special device to the top section which steams milk at the same time the coffee is being forced upwards. You fill the bottom with water and the basket with coffee like the basic stove top espresso maker but you also add milk to the top section before heating. This makes a reasonable cappuccino or latte. Once again the coffee is harsher than what you get from your ubiquitous corner coffee house because of the high water temperature. These are available on-line for about $50.
Always on the lookout for new and useful camping gadgets, I spied this manual espresso machine sitting in a vendor booth at the Overland Expo last year.
It's a manual pump type machine like a traditional espresso maker but made much smaller by using two handles and simplifying the design. The vendor wasn't selling them. Vendors and exhibitors at the Overland Expo are allowed to stay in their rigs or booths rather than having to be in the regular camping area at night. This was their morning coffee maker and they just happened to leave it out.
I was intrigued by it and snapped a picture. I didn't see anyone out and about at that booth in the morning and I never made it back after that. When I returned home I did some research on-line trying to find out what it was and where I could get one.
It turned out to be a ROK Classic Espresso Maker.
http://www.rokkitchentools.com/
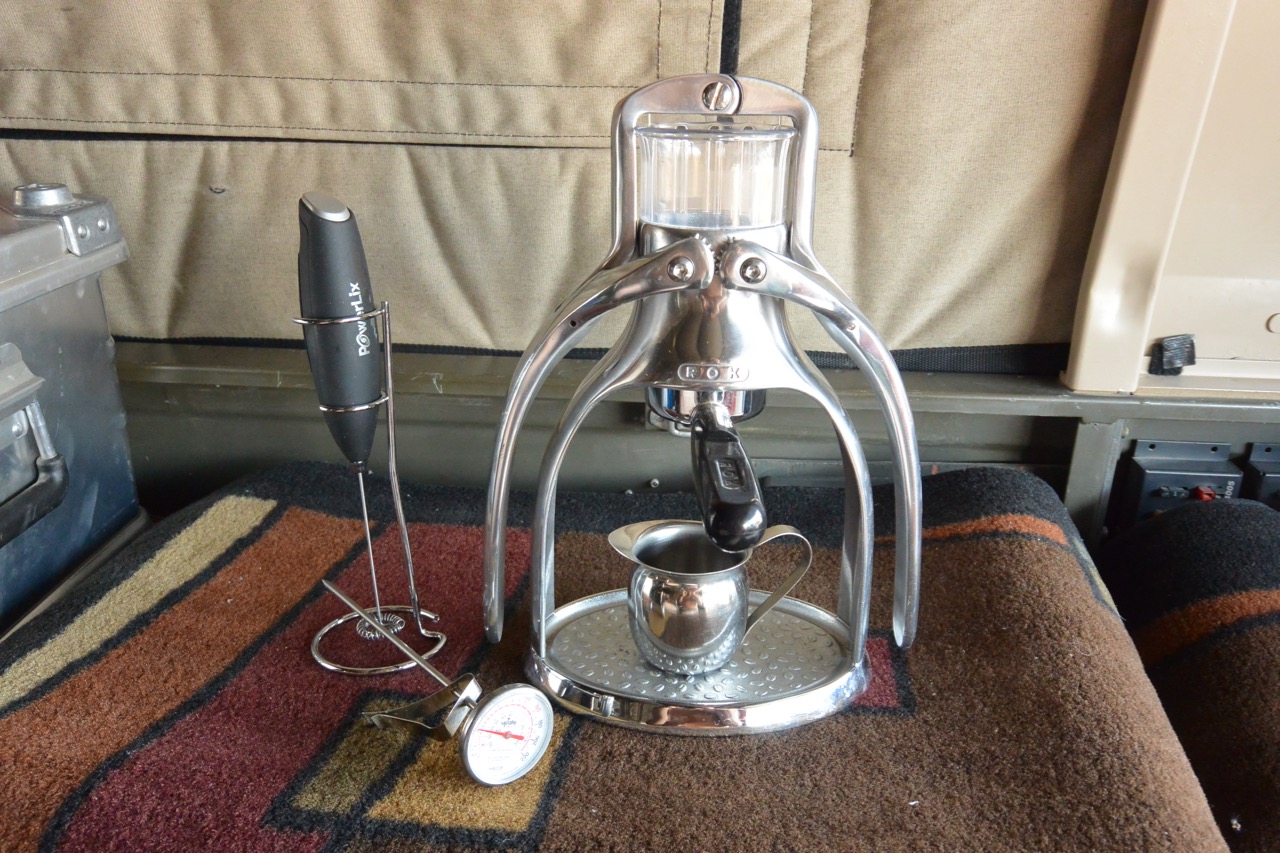
- ROK Classic Espresso Maker
- DSC_0229.jpg (345.89 KiB) Viewed 30458 times
I himmed and hawed about getting one most of the summer. When the plans for seeing the eclipse at the Oregon Star Party were finalized I knew that some of my friends who were going were gourmet coffee lovers so I decided to get one. They are available from Amazon and other sources on-line. I've never seen one in a store but I'm sure someone carries them.
It's not exactly cheap at $150 but if you use for a while rather than getting your latte at a coffee house you'll eventually save that much by making it yourself.
After reading on-line and watching YouTube videos on using this machine and the proper way to make a really good gourmet coffee drink I also got some additional paraphernalia to go with it; a thermometer to use when heating milk, a battery powered milk frother, and a long spout hot water kettle with a thermometer built into the lid.
I found that the key to making truly good espresso drinks is to not overheat the milk and the water used for brewing the coffee so having thermometers is necessary. The long spouted kettle makes it much easier to pour the hot water into the machine and I found that it didn't take up too much space in my camping kit.
If you want to check out my original product spotlight with a picture of the long spouted kettle look here -
viewtopic.php?f=70&t=4092&hilit=espress ... =10#p32670
(Warning: large picture files)
The ROK machine has a portafilter, the metal cup that holds the coffee, like any other pump or press type maker. You fill the portafilter with finely ground coffee and tamp it down with the included measuring cup/tamper. I like the design of the one that is included as it has a reinforced plastic tab so you can use your thumb pressure along with the rest of your hand to tamp the coffee. This design puts less stress on the plastic handle and makes it easy to apply the approximately 35lbs of recommended pressure. Since my hands are not calibrated it took some experimentation (and many cups of coffee) to get a feel for the right amount of pressure. Too little and coffee is weak, too much and you can't force the hot water through it.
To use the machine you first fill the portafilter (basket) with coffee as described above, place the portafilter in the machine, then with the handles in the down position add hot water to the plastic cup on the top until it's about a half inch from the top. You then slowly raise the handles allowing the water to flow down through the one way valve in the pump piston.
You then push the handles down until you feel some resistance and wait a few seconds. This allows the coffee to absorb water and expand. The exact amount of time is another variable that you need to experiment with until you get the best results. I found that one a few seconds was sufficient.
At this point you firmly and slowly push down on the handles while the espresso is forced out of the bottom of the portafilter. Don't forget to put a small cup of one of those fancy stainless steel pitchers underneath first. When you reach the end of travel hold the handles down until the espresso is finished pouring. Now release the handles and you will the remaining pressure in the pump assembly being released. You now have a very traditional cup of espresso and if you got all of the variables right it will be much better than anything you've tried at your nearby corner mega chain coffee joint. I would say that with a little practice you'll be able to get close to the quality of speciality independent gourmet houses all while camping out in the middle of nowhere.
Now if you want to add milk to make a cappuccino or latte you can have some milk heated up in pan to between 140 and 160 degrees. A thermometer is necessary to get the right temperature. For a long time I couldn't figure out why my coffee drinks at home didn't taste as good as those from even the mega chain corner coffee joint. I found that I was overheating the milk. If the milk is allowed to get above 160 degrees, the lactose sugars begin to break down. Using a thermometer to only heat the milk to the right temperature made a big difference in the final result.
You can get specialized stove top milk steamers to heat the milk and make froth like you get at the coffee houses. I found some but they were all over $100. I like my gadgets but I do have limits and that was way too much to spend to make foamy hot milk. Upon further research I found out about little European gadgets that are less than $10 for most or between $10 and $20 for a really fancy one.
It's the thing on to the left of the espresso machine in this picture. It's a battery powered milk frother. It works like a little power wisk. You partially submerge the end of it in the milk, push the button on the top and it spins at high speed frothing your milk. You simply pour cold milk in a small pan, make some froth, and heat the milk to the proper temperature. The instructions said to froth the milk cold. I found this requires some experimentation to get right so you don't end up with a pan full of milk foam that doesn't heat well. Personally I can take or leave the milk froth but it does have value in providing an insulating cover for your espresso drink to keep it warm when it's cold in the morning.
All of this sounds like a lot of elaborate trouble just for making coffee in the morning while camping but once you get the process down it really doesn't take that long and it's a real treat to have excellent coffee house style coffee out in the boonies.
It was definitely a hit with the folks I was camping with at the Oregon Star Party last summer. The biggest drawback was that I spent a half to an hour and half each morning making espresso drinks for everyone in camp.