The following is my attempt to come up with a DIY flexible storage solution
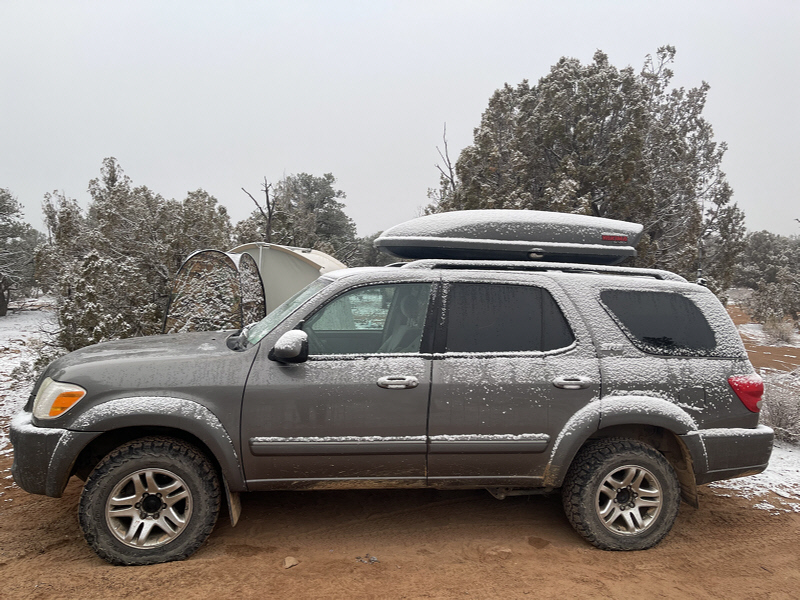
I use a fairly stock, older (2006) SUV both for daily driving and for off-road trips. For years, my "go to" storage solution has been as illustrated in the three following images. I've always used a rooftop cargo box to provide additional vehicle storage, primarily filling it with lightweight bulky items such as sleeping bags, chairs, and clothing. Then I've tried to organize the inside of the vehicle, which always seems to self-disorganize by the third day of a trip.
Yakima rooftop cargo box, an old friend.
- IMG_8489.jpg (279.54 KiB) Viewed 683 times
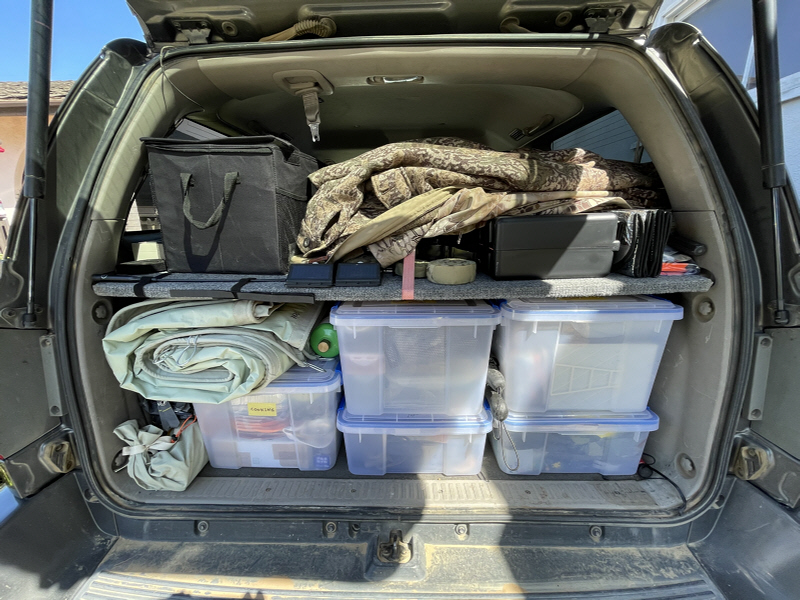
Typical view of the rear of my loaded vehicle. A divider offered a convenient way to achieve two-tier storage. Plastic boxes were easily removed and replaced. Jackets easily accessed during the evening.
- IMG_8396.jpg (286.62 KiB) Viewed 683 times
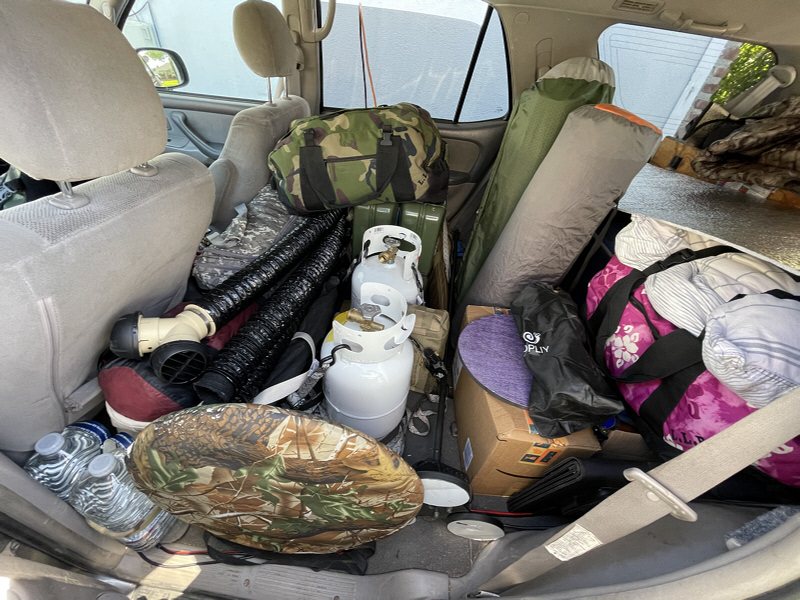
Inside of the vehicle with bulky propane tanks (relatively safe) and gas (not so safe). 2nd row passenger seats are removed. Propane and gas are held in place using straps through hooks attached using seat mounting holes in frame floor.
- IMG_8397.jpg (313.61 KiB) Viewed 683 times
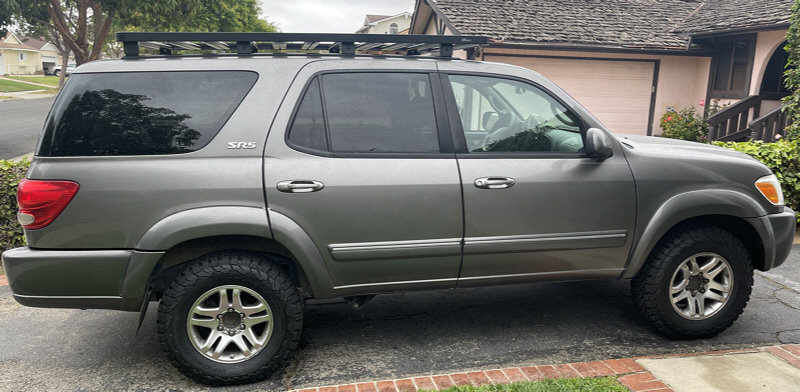
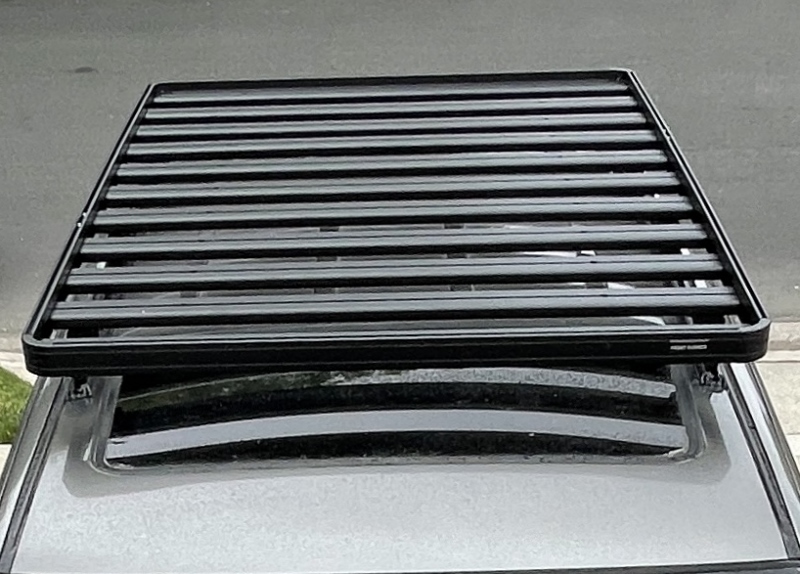
I really wanted to get gasoline cans outside of the cabin. I purchased a Front Runner Outfitters Slimline roof rack in part because they offered compatible mounts for standard NATO-style (Wavian) jerry cans.
- IMG_8855.jpg (198.52 KiB) Viewed 683 times
This rack was quite a pain to install. It was a "universal" rack, not specifically designed for my vehicle. I had to drill a number of holes in the roof and add blind rivet nuts (aka "rivnuts", "nutserts"). The aluminum did accommodate my roof, which was not flat, by bending.
- IMG_8859 v1.jpg (214.9 KiB) Viewed 683 times
The rack enabled transporting four 5-gallon jerry cans, two propane tanks, and a 10 gallon water tank, with leftover room for a solar panel. The Front Runner propane tank holders were sold out, so I cobbled something together from some
tank holder / stabilizers that I had on hand.
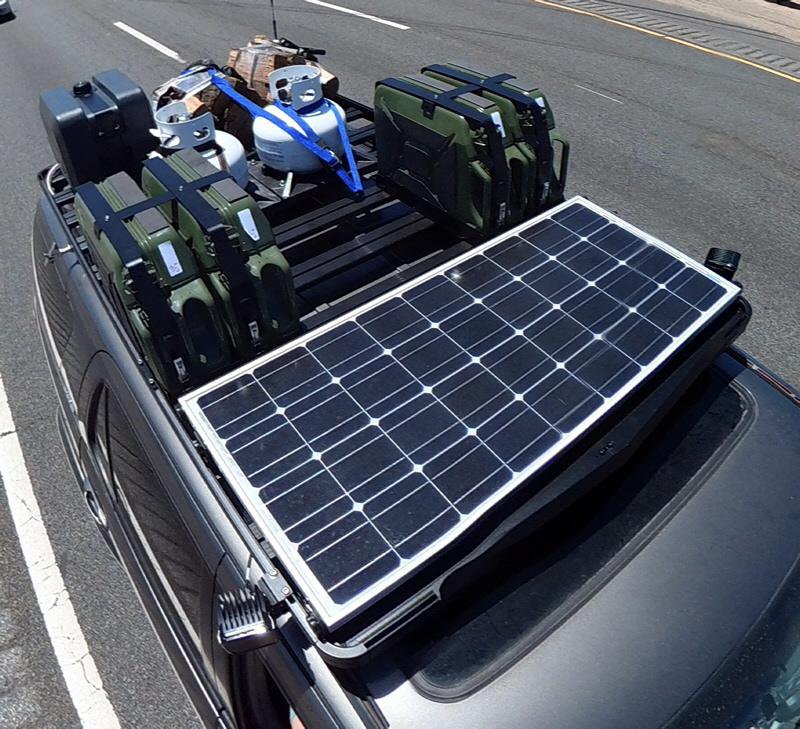
- Snapshot_202105135_120500.jpg (373.27 KiB) Viewed 683 times
My next step was to re-do the inside of my vehicle. I wanted a flat surface to which I could mount my fridge, battery, supporting electronics / wiring, and some kind of TBD storage, maybe drawers. The inside of the vehicle was not entirely flat, with seat mounting hardware and various bolt holes that had been used to hold 2nd and 3rd row seats. I mapped it all out.
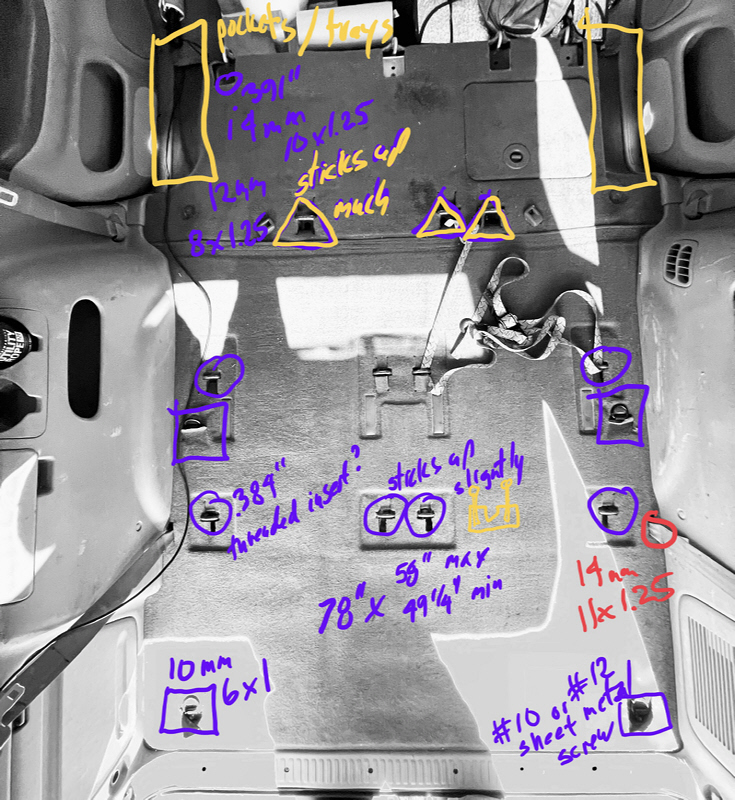
- IMG_8732.jpg (377.98 KiB) Viewed 683 times
The end result was a fairly flat, carpeted floor. Some of the bolts needed were non-standard (e.g., 11mm x 1.25) so I had to make those using similar-sized bolts, a lathe, and a die for threading. Pain in the @$$, but necessary.

- IMG_8940.jpg (292.32 KiB) Viewed 683 times
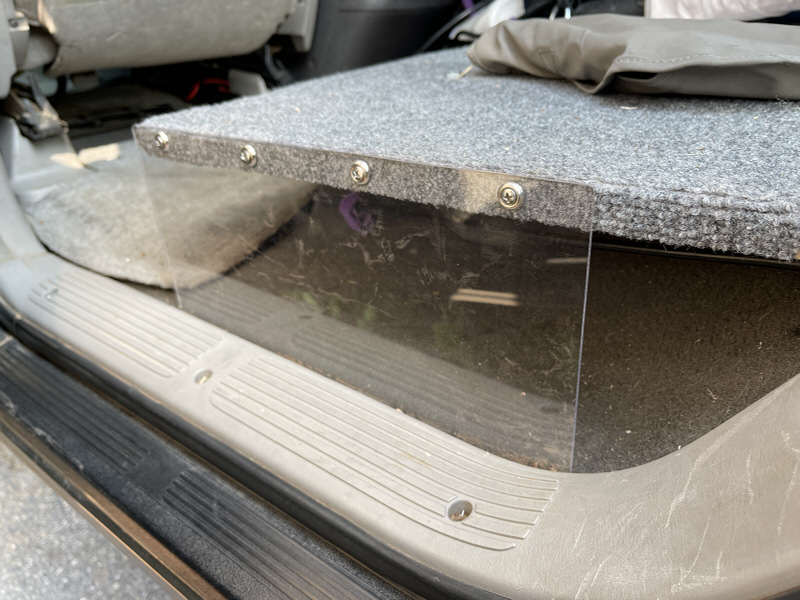
I tried to use every big of space. For example, where the floor overhung toward the doors, a lexan panel provided a nook behind which I can stash whatever.
- IMG_0083.jpg (253.04 KiB) Viewed 683 times
On the opposite side, I used the space for a solar controller (WMR Epic PWRgate) and related electronics which provide both alternator and solar charging. Here's the fridge, with a LiFePo battery in front plus electronics and wiring. Kind of messy, but it works fine and I completely understand it.
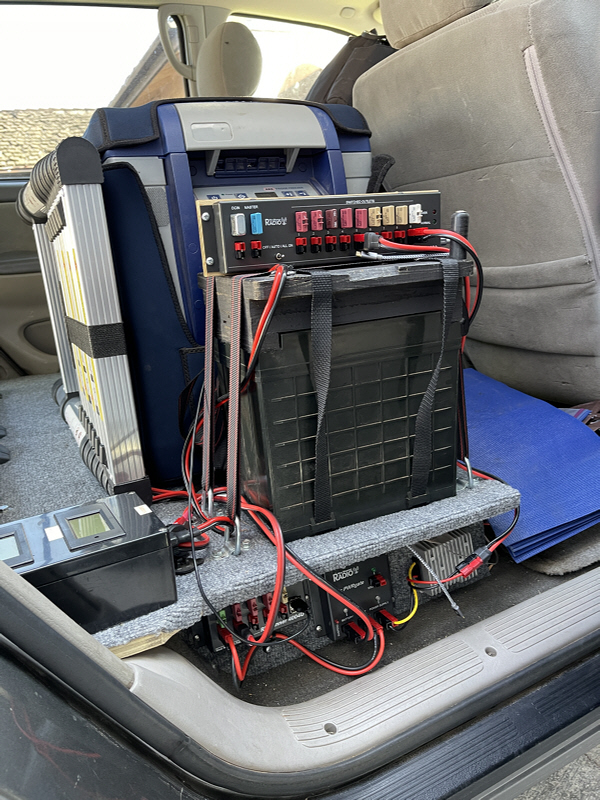
- IMG_0089.jpg (317.36 KiB) Viewed 683 times
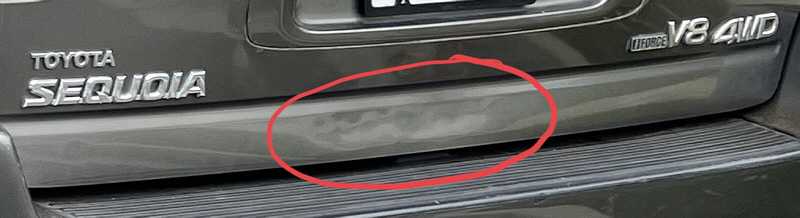
A well known problem with early Sequoias (presumably fixed by now) is that the rear door latch mechanism will (not can) eventually break. In fact, this has happened twice during trips. The door can only be opened by lifting a panel off the inside of the door to get at the latch mechanism. It is possible to avoid strain on this mechanism and postpone (eliminate?) breakage by applying pressure to the outside of the door while opening. The dent here (circled in red) has been caused by repeatedly kneeing the back of the door while opening to reduce strain. I'm not sure if my knee will outlast the door.
Anticipating that the latch mechanism will eventually break again, I didn't want to put anything permanent inside that made it impossible to access the inside of the door ... such as a nice drawer system.
- IMG_9256.jpg (103.39 KiB) Viewed 683 times
While buying plywood for the floor, I came across the Milwaukee Packout line of products which has apparently been out for a while and are well known by serious contractors. I viewed a number of YouTube videos and came to the conclusion that these might do the trick for vehicle camping storage.
Milwaukee Packout
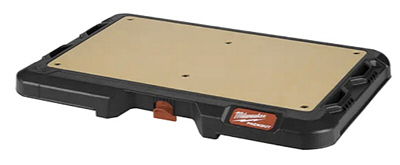
A key feature of the Packout line is that they can be locked together in a stack. This Mounting Plate is the first step in your stack.
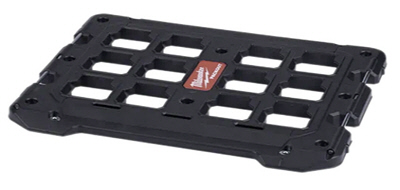
- MountingPlate.jpg (26.41 KiB) Viewed 674 times
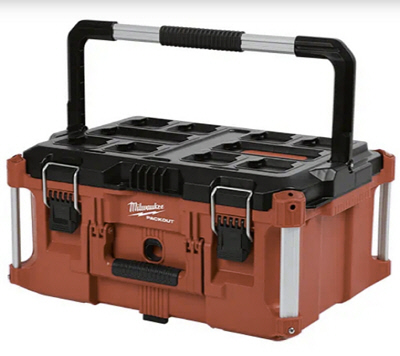
There are a fairly large number of products in the line. Right on top of the Mounting Plate, a drawer box can be mounted which allows access to its contents without moving any boxes. The drawers, especially the 2-drawer, seem very popular and might be hard to find as they just became available in June. I plan on buying a couple more 2-drawer boxes when they become available.
- 2DrawerToolBox.jpg (51.07 KiB) Viewed 674 times
- 3DrawerToolBox.jpg (50.73 KiB) Viewed 674 times
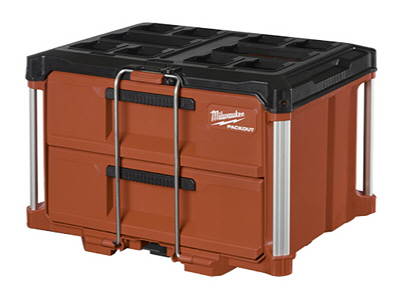
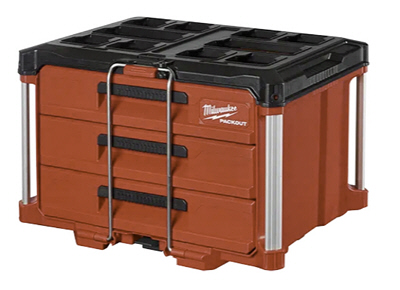
The large tool box provides a significant amount of storage for larger items that don't conveniently fit into the drawers, e.g., compressor, pots and pans, dutch oven. Initially, this was the only reasonably large box available.
- LargeToolBox.jpg (56.01 KiB) Viewed 674 times
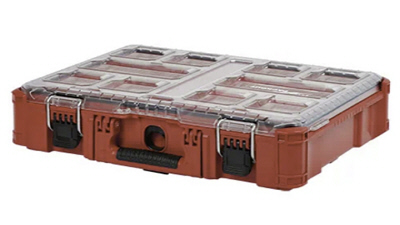
I use an Organizer to store everything that I need for evenings and inside the tent such as headlamps, flashlights, device charging batteries, and cords.
- Organizer.jpg (35.51 KiB) Viewed 674 times
The Compact Organizer is great for smaller items, such as a handgun with cleaning kit and ammo.

- CompactOrganizer.jpg (41.45 KiB) Viewed 674 times
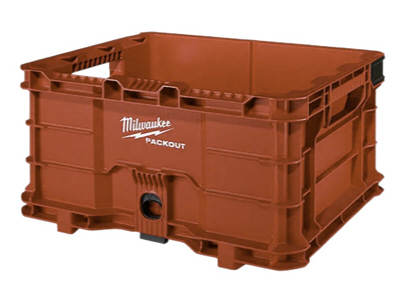
Crates are convenient to put on top of the stack for jackets and things that you want quick access to but don't want loose on the floor.
- Crate.jpg (49.81 KiB) Viewed 674 times
Got a Work Top for the heck of it. Have used for running a JetBoil and making breakfast.
- WorkTop.jpg (21.15 KiB) Viewed 674 times
The dolly is useful primarily at home when moving your Packout stack(s) between home storage and vehicle.
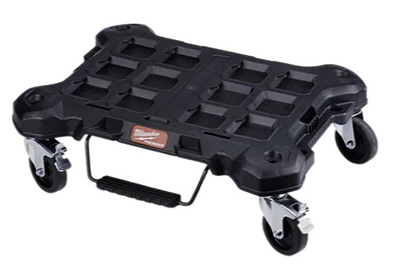
- Dolly.jpg (33.05 KiB) Viewed 674 times
I tried to layout the back of my vehicle with two rows of Packouts, with an open area in-between for items that don't fit, such as sleeping bags, seeing pads, chairs, and propane fire pit. The rearmost mounting plate is positioned such that I can remove any mounted Packouts even if the rear door latch mechanism fails.
The fridge is where my wife wanted it. She had complained for a few years about the previous location.

My theory is that--in case of an accident--the front row of Packouts will hold back anything in the open area. I of course don't know if the Packouts themselves will stay in place under high G forces.
One drawback to the Packouts is that they’re somewhat bulky relative to the storage space provided.
The Mounting Plates are held down with bolts and T-nuts.
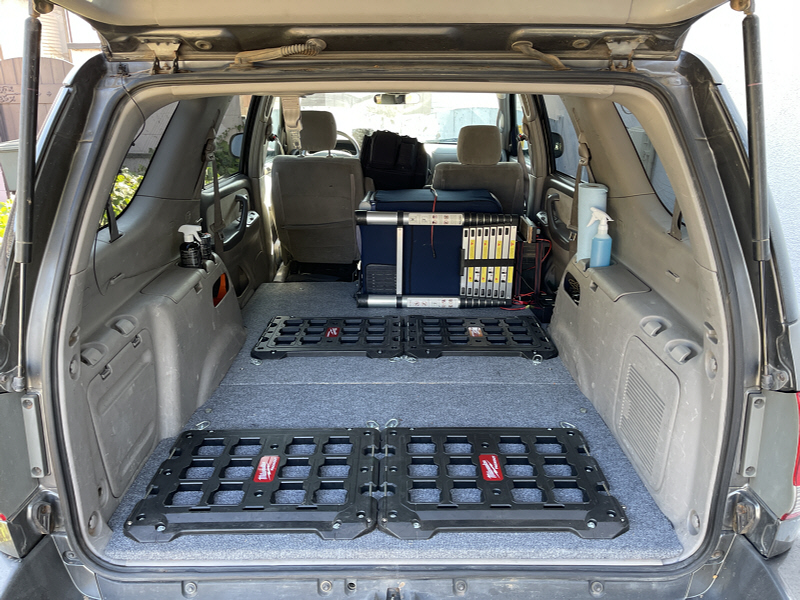
- IMG_0087.jpg (314.47 KiB) Viewed 683 times
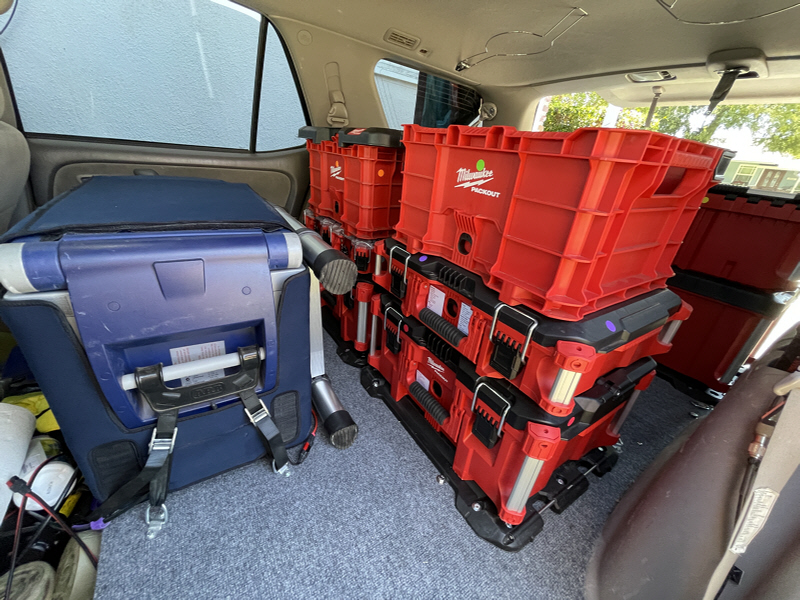
Here's a rear view of the back loaded up. All of the Packouts are marked with labels noting their contents. I discovered that the drawer boxes are slightly taller than the large tool boxes such that the crates no longer fit when stacked on the third level. I may eventually move the rear Mounting Plates about an inch forward to allow this. That’s a stove of the right side.
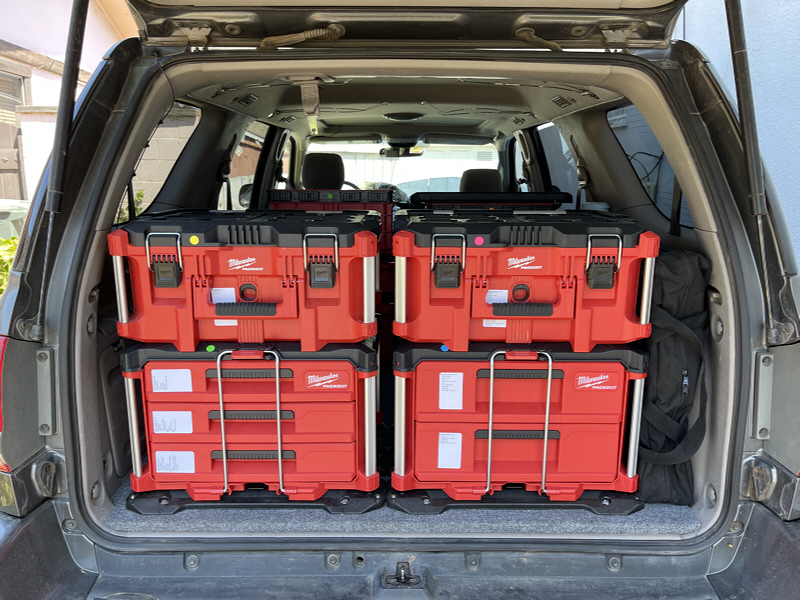
- IMG_0097.jpg (319.88 KiB) Viewed 675 times
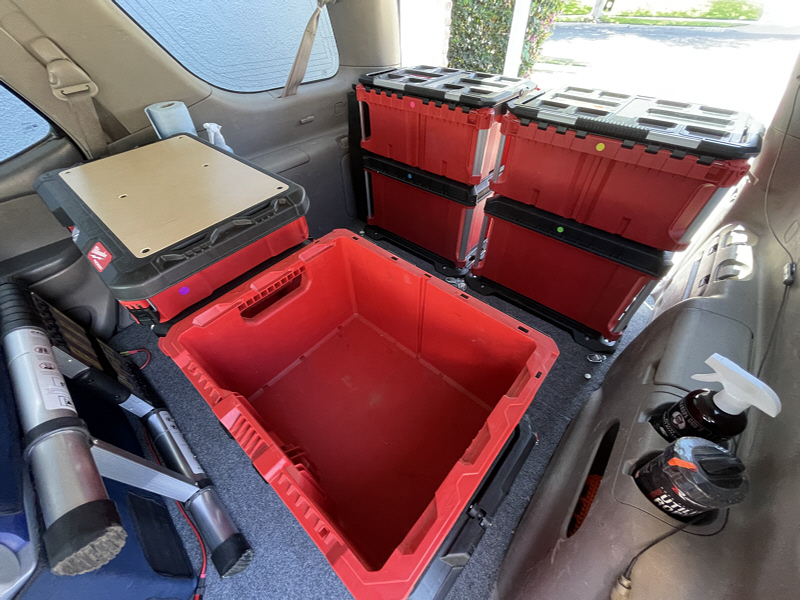
Inside look with two crates on top. The large tool boxes are actually reasonably accessible even with the other boxes on top. An entire stack can be tipped back, assuming there's nothing huge behind it.
- IMG_0099.jpg (318.61 KiB) Viewed 675 times
Higher view showing fairly large area between Packout rows.
- IMG_0096.jpg (284.68 KiB) Viewed 675 times
And a look into the large area which as I mentioned can fit propane firepit, sleeping bags, sleeping pads, chairs, tent, tent poles, and clothing.
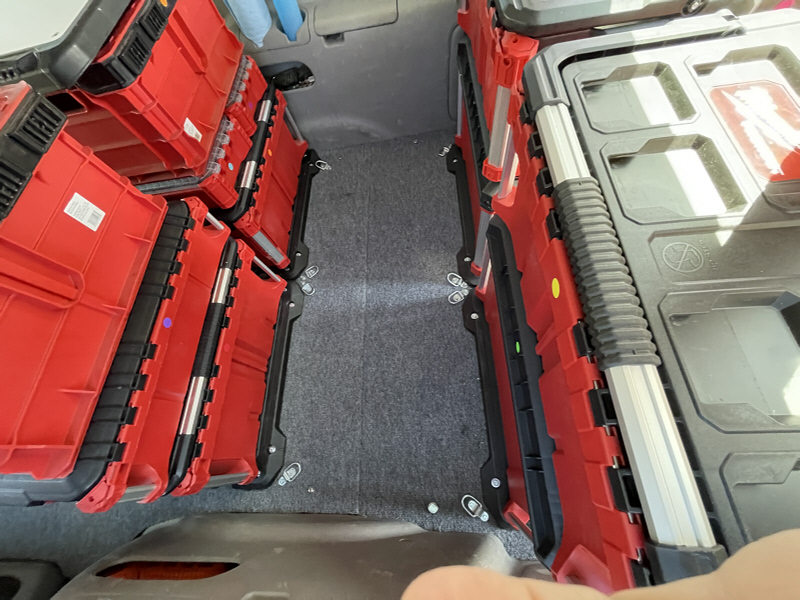
- IMG_0098.jpg (270.95 KiB) Viewed 675 times
Lastly, I had some unused space on the roof rack that opened up when I moved the propane tanks to the sides. I wanted a box that was somewhat aerodynamic, but I couldn't find an existing Thule or Yakima that exactly fit in the open space, so designed one.
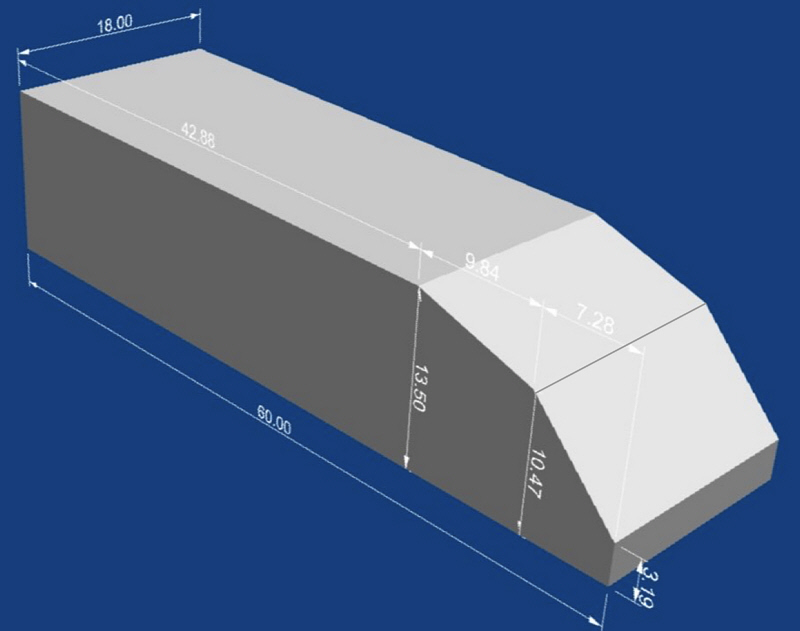
- IMG_9960.jpg (71.18 KiB) Viewed 683 times
Here it is as yet unused. I used exterior grade 1/2" plywood and painted over it with an ugly gray waterproof / UV-proof coating. I also had a company make a waterproof cover that exactly fit it, but found that it quickly mildewed on the box. Still trying to figure out a mildew-proof coating for this, though not sure anything will stick due to the waterproof coating.
My intent is to store tentpoles, longer tools (e.g., axe), ice/snow scraper, and chairs. we'll see.

- IMG_9451.jpg (135 KiB) Viewed 683 times