Donate

Re: OAUSA Net - April 4, 2024 - Outdoor Cooking (and indoors too)

A preview of future nets
User avatar
DaveK
Site Admin
Posts: 3849
Joined: Tue Mar 11, 2008 10:33 am
Call Sign: K6DTK
Location: American Southwest

Re: OAUSA Net - April 4, 2024 - Outdoor Cooking (and indoors too)

Post by DaveK » Sun Apr 07, 2024 11:29 am

Outdoor Cooking (and indoors too)

GOOD NEWS!~!!!!

OUR REPEATER IS BACK IN ACTION AND OUR NET WILL PROCEED TONIGHT.


This net will consistent of two sessions, with Becky, KF6RGR, taking the first session. I will be posting many of the pictures and text that Becky has prepared. And, away we go.
________________________________________________________

By Becky KF5RGR

For tonight’s net we will be discussing outdoor cooking, using a variety of cooking vessels. I will explain how I use, clean and season my cast iron pots and lids. I didn’t use to pay much attention to the lids, but after turning one over one day, I decided that the lid also needs proper attention. The cast iron I use for the stove have nipples on the inside (duh) of the lid that will self-baste the foods as you cook. If you don’t want the steam to gather in the pot or skillet, don’t use a lid.

Cleaning Cast Iron

Chain mail to clean crusty cast iron

RGR-1.jpg
RGR-1.jpg (45.28 KiB) Viewed 32744 times

Cast Iron Conditioner

RGR-2.jpg
RGR-2.jpg (24.14 KiB) Viewed 32744 times

Propane bottle holder

RGR-3.jpg
RGR-3.jpg (40.49 KiB) Viewed 32744 times
DaveK
K6DTK


Extremism in the defense of liberty is no vice.
Moderation in the pursuit of justice is no virtue.

User avatar
DaveK
Site Admin
Posts: 3849
Joined: Tue Mar 11, 2008 10:33 am
Call Sign: K6DTK
Location: American Southwest

Re: OAUSA Net - April 4, 2024 - ?????

Post by DaveK » Sun Apr 07, 2024 11:30 am

Cast Iron Cooking Tools

Gloves and lid lifter for Dutch oven

RGR-4.jpg
RGR-4.jpg (51.24 KiB) Viewed 32744 times

Holder to set lid on or to stack ovens on top of each other

RGR-5.jpg
RGR-5.jpg (59.11 KiB) Viewed 32744 times

Older version of Volcano

RGR-6.jpg
RGR-6.jpg (41.51 KiB) Viewed 32744 times

Dutch Oven cover

RGR-7.jpg
RGR-7.jpg (40.61 KiB) Viewed 32744 times

Dutch Oven set up with flat griddle underneath to hold briquets

RGR-8.jpg
RGR-8.jpg (53.01 KiB) Viewed 32744 times

Tripod to set over an open fire (this can be deleted if room is needed)

RGR-9.jpg
RGR-9.jpg (39.47 KiB) Viewed 32744 times
DaveK
K6DTK


Extremism in the defense of liberty is no vice.
Moderation in the pursuit of justice is no virtue.

User avatar
DaveK
Site Admin
Posts: 3849
Joined: Tue Mar 11, 2008 10:33 am
Call Sign: K6DTK
Location: American Southwest

Re: OAUSA Net - April 4, 2024 - ?????

Post by DaveK » Sun Apr 07, 2024 11:30 am

New Tools and Charcoal Recommendations


New Collapsible Volcano - https://VolcanoGrills.com

New Volcano.png
New Volcano.png (98.38 KiB) Viewed 32744 times


Lodge Coal Chart for Dutch Ovens - https://www.lodgecastiron.com/story/how ... dutch-oven

Coal Chart.png
Coal Chart.png (301.14 KiB) Viewed 32744 times
DaveK
K6DTK


Extremism in the defense of liberty is no vice.
Moderation in the pursuit of justice is no virtue.

User avatar
DaveK
Site Admin
Posts: 3849
Joined: Tue Mar 11, 2008 10:33 am
Call Sign: K6DTK
Location: American Southwest

Re: OAUSA Net - April 4, 2024 - ?????

Post by DaveK » Sun Apr 07, 2024 11:32 am

BECKY'S FAVORITE RECIPES

Tembo Tusk Recipe for Fish Tacos With a Chipotle Aioli Sauce

The Cooking Device

Tembo Tusk Skottle - https://Tembotusk.com

Tembo Tusk Skottle.png
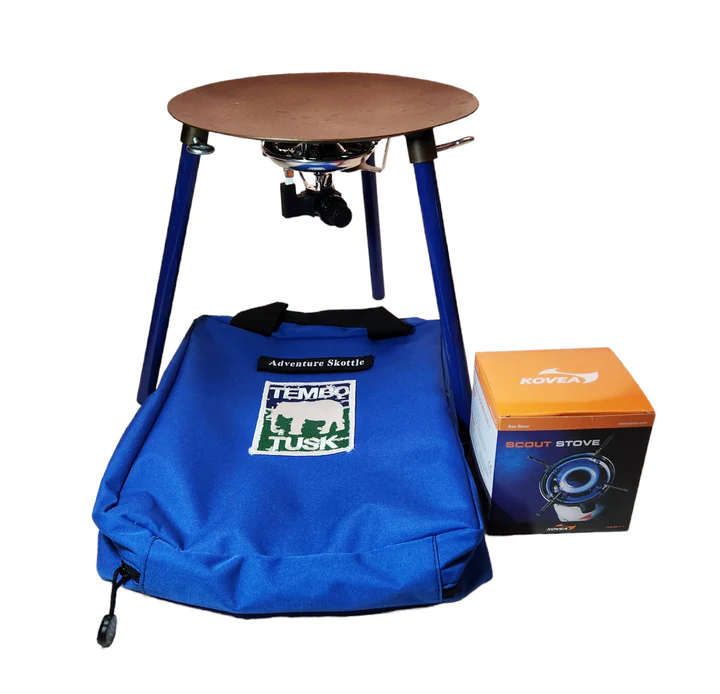
Tembo Tusk Skottle.png (399.22 KiB) Viewed 30287 times


The Recipe


Ingredients

Butter
3 cod fillets
1 tbsp chile powder
1 tsp garlic salt
3 limes
Chopped cilantro
1 cup mayonnaise
1 tbsp honey
2 canned chipotle chiles in adobo sauce
Salt and pepper
2 large tomatoes
1 white onion
1 jalapeno
Purple cabbage
White corn tortillas
Cooking Tools
Skottle
Spatula/Tongs
Knife
Lid
Cutting board
Spoon
How To: When Using The Tembo Tusk Skottle Grill

You can find this recipe and similar ones on line by searching, "Fish Tacos with a Chipotle Aioli Sauce"

Cut fish fillets in half for a faster cook. Season with chile powder, garlic salt, and the juice of 1 lime. Set aside.
To make the chipotle aioli sauce combine chopped cilantro, mayo, honey, chipotle chiles, the juice of 1 lime, salt and pepper. Set aside and refrigerate if possible.
Next make the pico de gallo. Combine the finely diced tomatoes, onion, cilantro, and jalapeno with the juice of 1 lime, salt and pepper.
Turn the Skottle to medium/low heat. Place about 1 tbsp of butter in the center of the pan and move around until melted.
Place fillets in the center of the Skottle, drizzle a small amount of adobo sauce on top of each piece of fish, and cook.
When the fish is almost cooked, push tortillas to the edge of the Skottle to warm.
Once the fish is cooked and has a nice glaze, push to the edge of the Skottle. Brown tortillas one at a time in the center of the Skottle.
Assemble your tacos with purple cabbage, pico de gallo, chipotle aioli sauce, and guacamole. Enjoy!


Chicken and Doritos

In a large 12” deep cast iron dutch oven, melt a couple tablespoons of butter on the bottom. Roll a 3-4 pound whole chicken in the melted butter so it is buttery all over. Or if you have a smaller pot, melt the butter and pour over from the smaller pot. Crush a large bag of Nacho Cheese Doritos and sprinkle over the chicken. Cook at 350° (17 briquets on top, 8 briquets on bottom), for 1 hour 10 minutes. Take the chicken out of the dutch oven and place in a heat resistant bowl. Shred the chicken off the bones. This can be used with your choice of corn or flour tortillas for street tacos, or larger flour tortillas for burritos.

Heating up a can (or premade homemade) pinto, adzuki or black beans, along with some shredded cheese and chopped up onions makes for a great tasty meal.

When we made this for a Big Bear camping trip, we intended to feed 4 adults and 4 children. However, hubby helped a little boy who crashed his bicycle near our camp and took him to his family. A little while later, the father brought us some carne asada, which we gladly added to our meal, but also shared some of our Dorito Chicken.

Peach Cobbler

Family reunion pot luck dish I made for at least 20 adults and that many more kids of various ages. However, most of the kids ate ice cream that was not made at this campout.

12” or 14” dutch oven
Foil
1 number 10 can of halved or sliced peaches, fluid drained
1 cup Bisquick mix (You may need two batches of the Bisquick mix)
1 cup milk
½ cup butter
1 tsp cinnamon
1 tsp nutmeg
1 cup sugar

Line your Dutch oven with the foil to help with clean up and help preserve the Dutch oven patina. Layer the peach halves in the Dutch oven. If you prefer, slice or dice the peaches. Mix a batch of Bisquick and pour over the peaches. Add another batch if you think it doesn’t cover enough of the peaches. Sprinkle the sugar over the top. Bake at 350° for 1 hour and use appropriate number of briquets. Serve with vanilla ice cream.


Rice with Spam and Eggs and Mixed Veggies (Skottle Recipe)

½ cup rice per person, make at camp or make ahead
1 can of low Sodium Spam, chopped in bite sized pieces

1 cup each:
chopped carrots (thinly sliced)
Scallions
chopped Spinach, kale, chard or other greens

1 can sliced water chestnuts
1 package fresh English peas from Trader Joes
4-6 garlic cloves chopped OR 1 tsp granulate garlic
1 tsp pepper

Cook rice in Skottle according to directions on package, usually 1 cup rice to 2 cups water, veggie broth or chicken broth. Cover and let simmer until rice is al dente. It will cook more when adding all the other ingredients.

OR you can precook your rice at home, if you have enough room in your ice chest or ARB fridge. Yes, you can freeze cooked rice. In fact, it's actually preferable to storing it in the refrigerator, even if you plan to use it within a matter of days. This is because uncooked rice contains a spore-forming bacteria known as Bacillus Cereus. Once cooked, the bacteria in the rice is killed, but because the spores are so heat resistant, they will remain in the rice. When cooked rice is stored for some time, the bacteria can start to grow again, leading to food poisoning. However, storing the rice in the freezer prevents the formation of bacteria, making it the safer option even for short-term storage. All types of rice freeze well, including white, brown, and even fried rice (containing meat and veggies). Batch cooking rice and freezing it for later can be a serious meal prep game changer. This information was taken from https://www.allrecipes.com/article/can- ... oked-rice/.

If you are using uncooked rice, after the rice is cooked, add chopped up spam and veggies, saute’ing them in a little oil or butter with the rice until heated through.

This can be a main lunch or dinner dish or can be a Mulligan Stew for last day breakfast. If you make the last day breakfast dish, use whatever meat or veggies you might have to add. Whip 4-6 eggs along with some half and half and pour over the cooked meat and veggies. Set temperature to low and cover until the egg is done.
DaveK
K6DTK


Extremism in the defense of liberty is no vice.
Moderation in the pursuit of justice is no virtue.

User avatar
Jeff-OAUSA
Posts: 405
Joined: Thu Jul 21, 2016 7:57 pm
Call Sign: WD6USA
Location: California

Alternative Cooking Methods (Discada) - OAUSA Net - April 11, 2024

Post by Jeff-OAUSA » Wed Apr 10, 2024 5:18 pm

Cooking Methods to Consider

There are many ways to cook outdoors using methods other than the charcoal grill, gas grill, gas stove, and Dutch oven (traditional methods). Here, the OAUSA net will introduce alternative methods of outdoor cooking for your consideration...not because the alternative methods are better than the more traditional methods, but because they are techniques that may help one expand their range of outdoor cooking capabilities and enhance their outdoor cooking options and enjoyment.

Discada Method
Discada (a.k.a., Plow Disc Cooker, Disco Cooker, Plow Disc Grill, Cowboy Wok or Disk Cooker_ - Is Spanish for cooking in an agricultural disc that yields spectacular flavors. Folks have been using the Discada ever since the disc plow was around and it's been a secret of the Southwest for a long time.

Heat Source
Discadas can be heated using a gas burner or directly over coals. Because Discadas transmit heat quickly, use over coals is facilitated by raising the disc above the coals with built-in legs or a stand.

Pros and Cons
Pros
  • Communal - Great for multiple cooks and gathering around the cook(s) to watch food preparation
  • Large - Great for cooking for a group or family
  • Cleanup - With good meal planning, cooking can often be accomplished in one disc, minimizing the pots and plans to clean
Cons
  • Large size and weight can make transport a challenge
  • Safety - Discs on burners can be unstable...make sure the disc fits the burner securely and keep children away from the disc while cooking
  • Evenness - Discs have pronounced hot and warm areas...plan food preparation carefully to optimize use of the distinct heat zones inherent in disc cooking
Photos

A
Discada on Burner in Use.jpg
Discada on Burner in Use.jpg (30.03 KiB) Viewed 22954 times
B
Discada on Coal Legs.JPG
Discada on Coal Legs.JPG (44.23 KiB) Viewed 22954 times
C
Discada Trivet.jpg
Discada Trivet.jpg (439.05 KiB) Viewed 22952 times
D
Discada Cooking in Zones - Kent Rollins.jpg
Discada Cooking in Zones - Kent Rollins.jpg (540.58 KiB) Viewed 22954 times

Information and Credits
Equipment: https://www.southwestdisk.com/about-us/ - Made in the USA by Americans.
Recipes: https://kentrollins.com/discada/ - Recipes and cooking videos from an American Patriot.
Last edited by Jeff-OAUSA on Wed Apr 17, 2024 1:31 pm, edited 5 times in total.
WD6USA

The middle of nowhere is somewhere I'd prefer to be.

"If future generations are to remember us with gratitude rather than contempt, we must leave them something more than the miracles of technology. We must leave them a glimpse of the world as it was in the beginning, not just after we got through with it."- Lyndon B. Johnson, President of the United States

User avatar
Jeff-OAUSA
Posts: 405
Joined: Thu Jul 21, 2016 7:57 pm
Call Sign: WD6USA
Location: California

Alternative Cooking Methods (Can Cooker) - OAUSA Net - April 11, 2024

Post by Jeff-OAUSA » Thu Apr 11, 2024 8:50 am

Cooking Methods to Consider

There are many ways to cook outdoors using methods other than the charcoal grill, gas grill, gas stove, and Dutch oven (traditional methods). Here, the OAUSA net will introduce alternative methods of outdoor cooking for your consideration...not because the alternative methods are better than the more traditional methods, but because they are techniques that may help one expand their range of outdoor cooking capabilities and enhance their outdoor cooking options and enjoyment.

Can Cooker
Can Cooker - The origin of this method goes back to a simpler time of ranch life. According to accounts, its inventor, Seth McGinn, witnessed a method used on his grandparents' ranch in East Nebraska. Before ranch work like branding cattle began, a large cream can would be filled with ingredients like meat, vegetables, and spices. This can would then be placed on a fire for slow-cooking with steam while the cowboys tended to their duties. By lunchtime, a delicious and hearty meal would be ready, cooked to perfection seemingly effortlessly.

Can Cookers are not pressure cookers. The Can Cooker utilizes steam to cook food, and include a steam vent to prevent the vessel from becoming pressurized. Never, ever plug the steam vent and make sure it is open before and during use.

Heat Source
Heat sources for Can Cookers can be stove-top, grill, open fire, and coals. It is important to use a low to medium heat source, similar to cooking with a Dutch oven. If using open fire or coals, indirect heat is suggested and can be achieved using a grate or rocks to keep the Can Cooker above and out of direct contact with the flames or hot coals. A coating of soap on the outside of the Can Cooker can make cleanup easier when cooking over open fire flames or coals.

Pros and Cons
Pros
  • Simple and Easy to Use: The Can Cooker is known for its user-friendly design. Once you add your ingredients and water, it requires minimal monitoring.
  • Versatility: The Can Cooker can be used for a variety of dishes, from steaming vegetables and seafood to slow-cooking stews and roasts.
  • Moist and Flavorful Food: Steam cooking helps lock in moisture and natural flavors, resulting in tender and delicious food .
  • Portable: The Can Cooker is lightweight and compact, making it ideal for outdoor cooking adventures like camping, tailgating, or picnics.
  • Works on Various Heat Sources: The Can Cooker can be used over campfires, grills, camp stoves, or even on your home stovetop.
  • Easy Cleanup: The smooth aluminum interior makes cleanup a breeze, often requiring just soap and water.
Cons
  • Limited Browning: Since the Can Cooker relies on steaming, it doesn't achieve the same level of browning as grilling or pan-searing.
  • Size Limitations: While there are various sizes available, the Can Cooker may not be suitable for very large quantities of food, depending on the size you choose.
  • Cost: The Can Cooker can be more expensive than some other outdoor cooking options, and some accessories like the cooking rack are sold separately.
  • Not Ideal for All Dishes: The Can Cooker might not be the best choice for recipes that require constant attention or high heat cooking methods like stir-frying.
  • Soot Stains (for campfire use): Using the Can Cooker directly over coals can leave soot stains on the exterior.
Photos

A
Can Cooker Basics.jpg
Can Cooker Basics.jpg (146.03 KiB) Viewed 22963 times
B
Can Cooker on Burner.jpg
Can Cooker on Burner.jpg (133.64 KiB) Viewed 22963 times
C
Can Cooker on Park Grill.jpg
Can Cooker on Park Grill.jpg (36.75 KiB) Viewed 22963 times
D
Can Cooker on Coals.jpg
Can Cooker on Coals.jpg (29.92 KiB) Viewed 22963 times

Information and Credits
Equipment: https://www.cancooker.com/product/cancooker-original/
Recipes: https://www.cancooker.com/recipes/
Last edited by Jeff-OAUSA on Thu Apr 25, 2024 7:28 pm, edited 10 times in total.
WD6USA

The middle of nowhere is somewhere I'd prefer to be.

"If future generations are to remember us with gratitude rather than contempt, we must leave them something more than the miracles of technology. We must leave them a glimpse of the world as it was in the beginning, not just after we got through with it."- Lyndon B. Johnson, President of the United States

User avatar
Jeff-OAUSA
Posts: 405
Joined: Thu Jul 21, 2016 7:57 pm
Call Sign: WD6USA
Location: California

Alternative Cooking Methods (Suspended/Elevated Cooking Stands) - OAUSA Net - April 11, 2024

Post by Jeff-OAUSA » Thu Apr 11, 2024 8:54 am

Cooking Methods to Consider

There are many ways to cook outdoors using methods other than the charcoal grill, gas grill, gas stove, and Dutch oven (traditional methods). Here, the OAUSA net will introduce alternative methods of outdoor cooking for your consideration...not because the alternative methods are better than the more traditional methods, but because they are techniques that may help one expand their range of outdoor cooking capabilities and enhance their outdoor cooking options and enjoyment.

Suspended/Elevated Cooking
The use of devices to suspend meat, vegetables, and pots over open fire trace back to prehistoric times.
  • Simple Supports: The earliest uses of cooking stands probably involved leveraging natural features like forked branches or large rocks to create a rudimentary hanging or support mechanism for roasting meats and cooking in pots.
  • Basic Tripod Structures: Early humans likely used simple tripod structures made from sturdy sticks to suspend cooking pots over fires. These early tripods would have been temporary and likely used for communal cooking.
  • Metalworking Advancements: The invention of metalworking around 4000 BC opened the door for more permanent tripod designs. Copper, bronze, and later iron would have allowed for stronger and more durable tripods.
  • Spread Across Cultures: Evidence of tripod use for cooking can be found in ancient civilizations around the world. Tripod cooking has been depicted in Egyptian art, mentioned in Roman writings, and used by nomadic cultures in Asia.
  • Essential Camping Tool: As exploration and travel increased during the Medieval period and beyond, tripods became a vital tool for travelers, soldiers, and explorers. They were lightweight, portable, and offered a reliable way to cook over campfires.
  • Standardization and Specialization: The 20th century saw a rise in standardized camping gear, including tripods. Tripods were often part of mess kits issued to military personnel and became commercially available for civilian campers.
  • Introduction of New Materials: Lighter and stronger materials like aluminum replaced heavier metals in tripod construction.
  • Continued Popularity: Today, campfire cooking tripods remain a popular choice for campers who enjoy the traditional campfire experience and the versatility they offer. They're also sometimes used in outdoor kitchens and backyards for a touch of rustic charm.
Heat Source
Tripods/Bipods/Quadpods and Cooking Stands are typically used over open fires, either campfire directly on the ground, or in recognition of Leave No Trace principles, using them over fires in containment systems.

In many respects, Discada cooking evolved from using Tripods/Bipods/Quadpods and Cooking Stands, where the burner below the Discada serves as both the stand and the heat source. Of course, Discadas can be hung from a Tripod/Bipod/Quadpod.

Pros and Cons
Pros - Tripods/Bipods/Quadpods
  • Adjustable Height: This is a big advantage of campfire Tripods/Bipods/Quadpods. By raising or lowering the pot or pan, you can easily control the cooking temperature over the fire.
  • Simple and Versatile: Tripods/Bipods/Quadpods are easy to set up and use. They can hold a variety of pot sizes, Dutch ovens, grates, and grills, making them suitable for many camp cooking tasks.
  • Fuel Efficient: By using firewood, Tripods/Bipods/Quadpods can be a sustainable and cost-effective way to cook compared to camp stoves that require fuel canisters.
  • Lightweight and Portable: Many Tripods/Bipods/Quadpods fold up for compact storage and transport, making them ideal for overlanding or car camping trips. Varies considerably based on design.
  • Open Fire Cooking Experience: Tripods/Bipods/Quadpods enhance the traditional campfire cooking experience.
Pros - Elevated Cooking Stands
  • Simple and Versatile: Elevated campfire cooking stands are easy to set up and use. They can hold a variety of pot sizes, Dutch ovens, grates, and grills, making them suitable for many camp cooking tasks.
  • Fuel Efficient: By using firewood, Tripods/Bipods/Quadpods can be a sustainable and cost-effective way to cook compared to camp stoves that require fuel canisters.
  • Lightweight and Portable: Many Elevated campfire cooking stands fold up for compact storage and transport, making them ideal for overlanding or car camping trips. The design of these stands varies considerably.
  • Open Fire Cooking Experience: Tripods/Bipods/Quadpods enhance the traditional campfire cooking experience.
Cons - Tripods/Bipods/Quadpods
  • Less Precise Heat Control: While adjustable, Tripods/Bipods/Quadpods don't offer the fine-tuned heat control you get with a camp stove.
  • Uneven Cooking: Depending on the fire size and pot placement, you might encounter hot spots and uneven cooking.
  • Requires Fire Management Skills: A good campfire is key for successful Tripods/Bipods/Quadpods cooking.
  • Stability on Uneven Terrain: Tripods/Bipods/Quadpods legs may require adjustment or additional support on uneven ground.
  • Not Great for Windy Conditions: Wind can affect the fire and make cooking more challenging.
  • Potentially Not Leave No Trace Compatible: Tripods/Bipods/Quadpods are often used over ground campfires that can leave long-lasting marks on the environment. These impacts can be mitigated if a firepan or similar device is used in conjunction with the Tripods/Bipods/Quadpods.t
Cons - Elevated Cooking Stands
  • Less Precise Heat Control: Most Elevated Cooking Stands have limited or no adjustability, which means that head control is accomplished via fire controlTripods/Bipods/Quadpods don't offer the fine-tuned heat control you get with a camp stove.
  • Uneven Cooking: Depending on the fire size and pot placement, you might encounter hot spots and uneven cooking.
  • Requires Fire Management Skills: A good campfire is key for successful Tripods/Bipods/Quadpods cooking.
  • Stability on Uneven Terrain: Tripods/Bipods/Quadpods legs may require adjustment or additional support on uneven ground.
  • Not Great for Windy Conditions: Wind can affect the fire and make cooking more challenging.
  • Potentially Not Leave No Trace Compatible: Elevated Cooking Stands are often used over ground campfires that can leave long-lasting marks on the environment. These impacts can be mitigated if a firepan or similar device is used in conjunction with the Elevated Cooking Stand.
Photos - Tripods/Bipods/Quadpods

A
Tripod Open Fire.jpg
Tripod Open Fire.jpg (77.39 KiB) Viewed 22937 times
B
Tripod LNT-A.jpg
Tripod LNT-A.jpg (91.45 KiB) Viewed 22937 times
C
Rack and Grill over Fire.jpg
Rack and Grill over Fire.jpg (223.38 KiB) Viewed 22937 times
D
Full Kitchen Quad Pod.jpg
Full Kitchen Quad Pod.jpg (414.11 KiB) Viewed 22937 times
E
Full Camp Kitchen Elaborate.jpg
Full Camp Kitchen Elaborate.jpg (56.55 KiB) Viewed 22923 times
F
DIY CookingTripod.jpg
DIY CookingTripod.jpg (116.96 KiB) Viewed 22937 times

Photos - Elevated Cooking Stands

G
Lodge Fire and Cook Stand.jpg
Lodge Fire and Cook Stand.jpg (190.63 KiB) Viewed 22937 times
H
Cook Stand Classic Expanded Wire Design.jpg
Cook Stand Classic Expanded Wire Design.jpg (434.96 KiB) Viewed 22937 times
I
Cooking Stand LNT.jpg
Cooking Stand LNT.jpg (375.28 KiB) Viewed 22937 times
J
Stake Stand.jpg
Stake Stand.jpg (133.5 KiB) Viewed 22937 times

Information and Credits
Equipment: There are hundreds of sources of this equipment, and it can be found via your favorite browser.
Recipes: There are hundreds of sources for recipes for cooking using a Tripod/Bipod/Quadpod or Cooking Stand over an open fire. Most traditional recipes can be adapted to this method of cooking.
Last edited by Jeff-OAUSA on Wed Apr 17, 2024 1:53 pm, edited 6 times in total.
WD6USA

The middle of nowhere is somewhere I'd prefer to be.

"If future generations are to remember us with gratitude rather than contempt, we must leave them something more than the miracles of technology. We must leave them a glimpse of the world as it was in the beginning, not just after we got through with it."- Lyndon B. Johnson, President of the United States

User avatar
lrsrngr
Posts: 481
Joined: Thu Apr 18, 2013 8:32 pm
Call Sign: KK6CTT
Location: SOCAL

Re: OAUSA Net - April 4, 2024 - Outdoor Cooking (and indoors too)

Post by lrsrngr » Fri Apr 12, 2024 1:08 am

KK6CTT for the online check-in...

There is over 22,000 pieces of legislation submitted for the 2024 session...some of it is firearm legislation.  Keep an eye on the ball and pushback as necessary.
There is over 22,000 pieces of legislation submitted for the 2024 session...some of it is firearm legislation. Keep an eye on the ball and pushback as necessary.
Shootin' Shack White Mountains, AZ Shadow 1024.jpg (450.77 KiB) Viewed 21600 times

Five pieces of firearm legislation in CA are ominous although one (TWO...follow-up 04/25/24) of the five was "gut and amended" and no longer moving forward.
  • SB 1160 (gut and amended on 04/09 with adjustments up for review on 04/23), required that a person register each firearm in their possession at the initial cost of $250 per firearm and $125 per firearm each year after. More information: https://www.youtube.com/watch?v=vvHB8Cuck7A&t=21s
  • AB 3064, Firearm Safety Devices, like the CA handgun roster, all safety devices have to be approved for use and on the safety device "roster."
  • SB 53, Firearm Storage, all firearms must be stored in a CA DOJ approved safe in the home.
  • SB 1253, Firearm Safety Certificate requiring all owners have a "current and valid" certificate when you have firearms in your possession. Now you only need the card to show you understand basic CA firearm laws and safety when purchasing a firearm. Passed out of Senate Public Safety
  • SB 3067 (reported "gut and amended"), Requires Insurance Companies to ascertain if you own firearms and where they are stored (reporting to the State Insurance Commissioner when there are discrepancies in reporting).
It is not all doom and gloom however:
  • AB 2571 "Youth Marketing" blocked 04/12/24. Safari Club International v. Bonta was Enjoined by Judge Dale A. Drozd, this law cannot be enforced by the state of CA and was appealed to the 9th Circuit Court. It was signed into law in JUN of 2022. This law negatively impacted all youth shooting sports/programs.
  • SB 2 substantially changed requirements for concealed carry in CA (restrictive). A DOJ emergency implementation of cancelling those who could provide training for CCW applications and renewals found NRA instructors no longer qualified to sign-off on CCW training which created a chokepoint where applications and renewals almost came to a standstill. A reversal on the emergency order and pushback from the 2A community and CA sheriffs created a path to reinstating prior instructors as trainers. A CA CCW convention where 57 of the 58 county sheriffs helped to bring about this change.
11% CA State Excise Tax:
  • On 01 JUL 2024, the tax goes into effect. Most do not know how the extra tax will look to consumers but there have been a lot of people trying to get there last large purchases in before July 1st.
  • The problem with this tax and the fact the legislature approved it, is no one has been effected by it until it is implemented and therefore, there is no "standing" to bring a case against the state or DOJ until that has been established. We'll see how this one progresses, but until then, make those pre-tax purchases.
Last edited by lrsrngr on Thu Apr 25, 2024 8:44 pm, edited 5 times in total.
H-U-A or "Hooah!" = Heard Understood & Acknowledged. In context: "Roger that sir, HUA!"

User avatar
lrsrngr
Posts: 481
Joined: Thu Apr 18, 2013 8:32 pm
Call Sign: KK6CTT
Location: SOCAL

Re: OAUSA Net - April 4, 2024 - Outdoor Cooking (and indoors too)

Post by lrsrngr » Fri Apr 12, 2024 1:18 am

Announcement: Big Bear Hamcation, 26-28 APR 2024: https://bigbearminihamcation.com/
There is a great lineup of speakers, topics and events (schedule): https://bigbearminihamcation.com/schedule/

Cooking in general...

Really quick:
  • If you don't have a chart for coal briquette amount and distribution: Diameter of the Dutch oven x 2. Then use one-third + two-third for bottom and top respectively. E.G., 12" DI x 2 = 24 briquettes needed. Divide 24 by 3 = 8; 8 briquettes for the bottom of the DI and 16 for the lid.
  • Turn the DI 180°every 15 minutes while indexing the lid back to its original position each time. This is done to insure you do not burn or scortch the food because you have a more intense briquette heat in one or another location. Kind of like
Definition:
  • My "egg pizza" is, what I understand, closely related to the Frittata cooking technique. I did not know of Frittata cooking, but I was trying to emulate a "quiche" style meal out in the field, and I think my technique closely resembles a failed attempt at quiche/frittata with a positive (although mistaken) learning curve along the way that gave way to our family's "egg pizza."
Observations:
  • Watching and learning is part of cooking in general. The things that taste good at home, fresh out of the oven like grandma used to make, should be the same recipes attempted in the field. The parts that make the meal, like cheesy gooey goodness, can be emulated in some form or fashion at the campsite. Learn the "make or break" "rules" and run with the creative "oh that was good" although unintentional...short of burning, or making people sick, it all has good to great potential!
  • When in doubt, get a bigger cast iron skillet. Don't crowd your food if you intend to get things cooked well. Learn to read the flame/heat and the surface temperature of the cookware to avoid burning and scorching, sometimes the recovery can add to the flavor and texture of the finished product...if you are lucky!

So, here we go. Anything that you can do in the oven you can duplicate in some manner with cast iron cooking. You just have to hone your technique. Here are some examples of meals I happened to have on my cell phone to share. This is a breakfast meal with leftover tater tots, sausage, probably onion, a few eggs stretched with some milk whipped in allowed to cook in a 12" skillet with a cast iron lid. This is a very common technique used when the family eats together. I call this "Egg Pizza" because we do not flip or stir once the egg is added and there is usually a dark bottom to this with a fluffy top. It is critical to use medium to low heat once you put in egg and allow the cheese to melt over the top of everything.
Breakfast 01.jpg (173.47 KiB) Viewed 22534 times

Here is example #2, same-same technique..."egg pizza." This was probably onion and bacon cooked up first then a little spinach added before the whipped egg was added. The whipped egg comes out like deep-dish "pizza" with a crust on the bottom. You cover with a lid as soon as the egg is added allowing a little breathing room for the lid to let out moisture and you add the cheese when you feel confident the egg is almost done so you don't have raw egg under your melted cheese. Too much lid cover will add too much moisture to your "egg pizza" but if you make that mistake, just uncover the almost finished result on low heat and let the moisture evaporate without the lid.
Breakfast 02.jpg (169.49 KiB) Viewed 22534 times

Here is a "doctored" Shin Ramyun meal that took quality Ramien to make. Sure, there are the Top Ramien noodle soups but this is the good stuff. I added spinach and cheese to this while keeping the water content low so that it was not soup after everything was said and done but more of a spicy noodle meal without all the juice. You can fry an egg and add it along with some protein as desired. You know, experiment with it!
Shin Ramyun 01.jpg (215.73 KiB) Viewed 22534 times

You can use traditional skillets with long handles or the more common Dutch ovens for cooking, but I found I like the skillets with the "ear tab" handles for packing considerations; the handles always seem to be awkward when trying to maximize packing space. This is a 2-piece combination skillet, pot and oven, with tabs, all in one setup. I have put a rock right in the middle of the fire pit and hot coals on top of the cover to get the Dutch oven effect when making a cherry desert. Sometimes I will line with aluminum foil if I think the pot will be too messy to clean later. This saves campsite cleanup, especially when dry camping and water saving is at a premium.
Lodge Cast Iron Collage.jpg (276.77 KiB) Viewed 22534 times

Cherry Crisp example done at the campsite.
Cherry Crisp 01.jpg (729.48 KiB) Viewed 22534 times

Sometimes the right tools and recipe go a long way. This is an example of a charcoal starter, the lid lifter and probably some gloves off to the side that help get the coals ready for a traditional Dutch oven cook where the lid of the Dutch oven is made to keep the briquettes on top and the legs leave room for them underneath. A rotation every 15 minutes will ensure you don't overheat in any one spot. I think I got a water heater pan to keep the coals and fire danger contained (not shown here).
180526, Cherry Crisp 07.jpg (152.38 KiB) Viewed 22534 times

And the fruits of the work are awesome! A can of whip cream or some ice cream in camp or an event speak volumes for the final touches! Note: The spoon has a hole I drilled in it that allows me to snaplink it to a fork with the same drilled hole. With a mini snaplink I am able to hang utensils after cleaning on a bungee "utility line" near/at the kitchen when in camp.
Cherry Dessert.jpg (93.24 KiB) Viewed 22534 times
Last edited by lrsrngr on Thu Apr 18, 2024 9:49 pm, edited 4 times in total.
H-U-A or "Hooah!" = Heard Understood & Acknowledged. In context: "Roger that sir, HUA!"

User avatar
DaveK
Site Admin
Posts: 3849
Joined: Tue Mar 11, 2008 10:33 am
Call Sign: K6DTK
Location: American Southwest

Re: OAUSA Net - April 4, 2024 - Outdoor Cooking (and indoors too)

Post by DaveK » Thu Apr 18, 2024 12:44 pm

Outdoor Cooking With The Pressure Cooker

Having camped for quite a number of years, I have seen and used many types of cooking styles and devices, and if there is one take away from my experiences, it is that it is the chef that makes the difference. Great meals are possible from just about every style and method. For me, the method that I use exclusively now is the pressure cooker.

When it comes to the topic of food at camp, in the wilderness, I start by selecting the meals that I enjoy the most at home. Since I have settled on the pressure cooker for the preparation of all of my camping dinner meals, the next task is to find pressure cooker recipes, and then home test my favorites. When I find the right ones, I add them to my growing list of camp meals.

One benefit of pressure cookers that goes completely unnoticed and unappreciated by the cook, his helpers, and those in or near the kitchen, is the redundancy of safety devices that are built into every cooker. Unlike pressure cookers of the 40s and 50s, today's are vastly safer. My current cooker has three pressure release locations, and in the event of an over pressure condition, the last line of pressure release will be when the cooker "blows the gasket." Although disabling the cooker, the benefits are obvious. Aside from this benefit, here are the others that I have appreciated:
  • The entire meal can be prepared in one pot
  • the pressure cooker is not affected by altitude
  • since the pot is sealed, more of the nutrients remain in the food
  • the pressure used to cook also infuses great flavor to the food
  • meals can be fully cooked in a fraction of the time by other methods, (saves fuel and time)
  • meals are served piping hot and remain so for the duration of the meal (especially appreciated when the weather turns cold and for those who wish seconds)
  • The list of menu items is short and simple
  • the pressure cooker takes up no more room that any other pot
  • GREAT FLAVOR FOR GREAT MEALS
My current cooker, by Cuisinart:

Cuisinart Pressure Cooker-1.jpg
Cuisinart Pressure Cooker-1.jpg (21.57 KiB) Viewed 21960 times

The pressure cooker ready for dinner.

Pressure Cooker Ready For Dinner-1.jpg
Pressure Cooker Ready For Dinner-1.jpg (135.36 KiB) Viewed 21960 times

Dinner on the Rim

Dinner on the Rim.jpg
Dinner on the Rim.jpg (836.28 KiB) Viewed 21960 times

While I have several favorites, there are at least three that have risen to the top. The ingredients listed do not include quantity, and if requested, I will add that information.
  • Chicken Adobo - cooks in 12 minutes
    chicken thighs
    soy sauce
    white wine vinegar
    garlic
    chipotles in adobo sauce
    onions
    bay leaves
    water
    olive oil
  • Beef Stroganoff - cooks in 20 minutes
    cubed beef (preferably filet)
    olive oil
    flour
    onions
    garlic
    beef broth
    mushrooms
    tomato paste
    Worcestershire sauce
    egg noodles
    biscuits
    sour cream
    Red wine
  • Beef Stew - cooks in 12 minutes
    cubed beef (preferably filet)
    flour
    salt and pepper
    olive oil
    onions
    beef broth
    bay leaves
    sage
    potatoes
    carrots
    celery
DaveK
K6DTK


Extremism in the defense of liberty is no vice.
Moderation in the pursuit of justice is no virtue.

Post Reply

Return to “OAUSA AMATEUR RADIO NET PREVIEW”

Who is online

Users browsing this forum: No registered users and 1 guest